If our basic pocket square folds are leaving you bored, then here is an extensive list of 50 folds. Click on the one(s) you like for detailed instructions:

Blog Archives
Day 50: Double Rose Fold

To finish off my 50 Folds in 50 Days series, I decided to end with a more complicated fold. By now you should have plenty of practice and I am confident that you will master this unusual fold as well. Simply follow these 12 steps:
Double Rose Fold Step-by-Step:
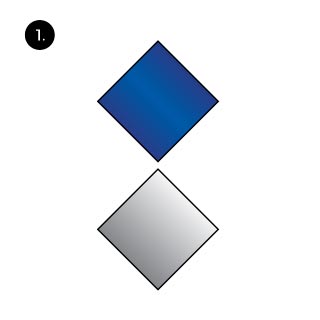 Take 2 pocket squares and lay them down flat.
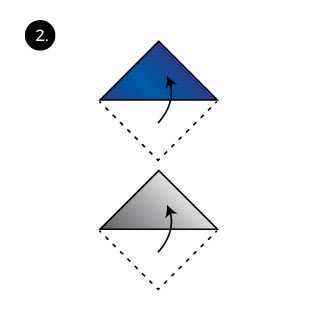 Fold both into a triangle.
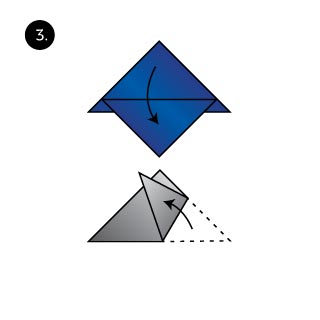 The pocket square that will be the actual rose (blue one shown) is folded down with one leaf. For the outer pocket square (white one shown), fold up one of the tips so they extend past the edge of the triangle.
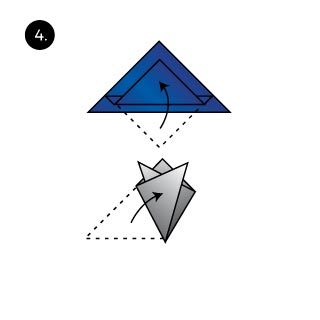 For the rose (blue pocket square), create a pleat fold. For the other pocket square fold in the opposite corner.
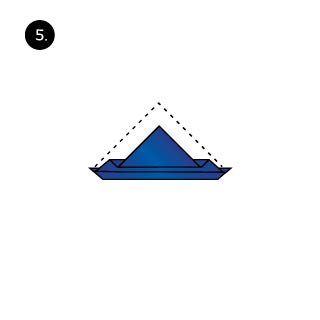 Continue to finish the rose. Next, we pleat both parts of the triangle.
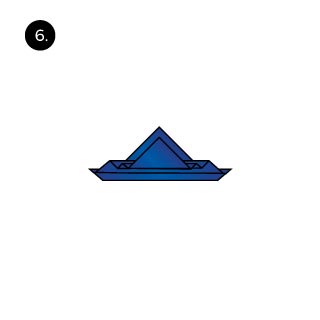 And, lets do another pleat.
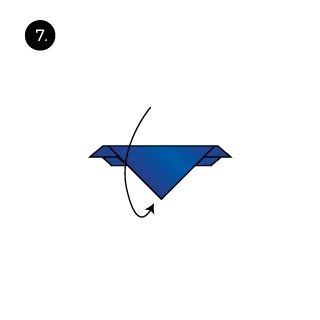 Turn the pocket square over and upside down.
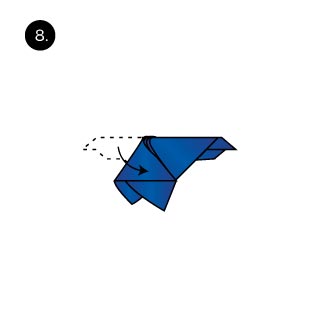 Fold in one of the sides.
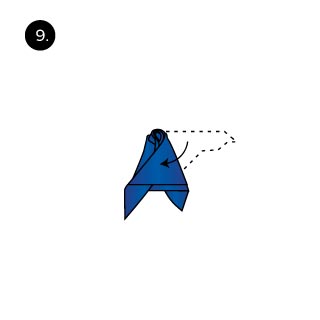 Now, fold in the other side. The rose is complete.
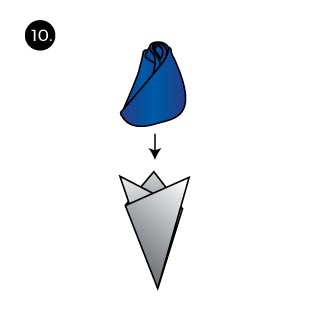 Neatly place the rose into the pocket of the other pocket square.
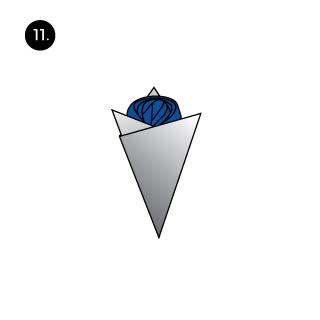 Adjust until just enough of the rose is visible.
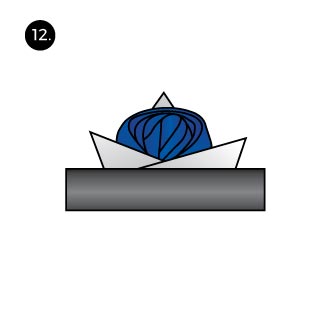 At last, place the completed fold into your breast pocket. That’s all!
Day 49: The Sail Fold

A close relative to the Sailing Ship Fold is the Sail fold shown here. Because the “sails” point towards your lapels, they look best when paired with jackets that have smaller to medium width lapels. Here is how you create this fold:
Sail Fold Step-by-Step:
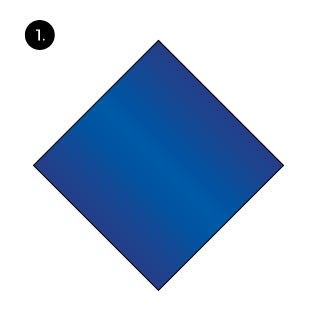 Lay the pocket square down flat.
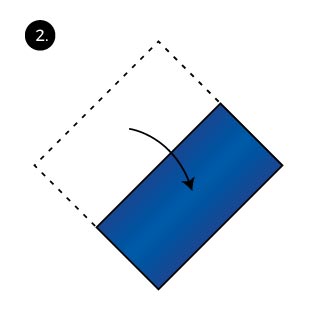 Fold in half to create a rectangle.
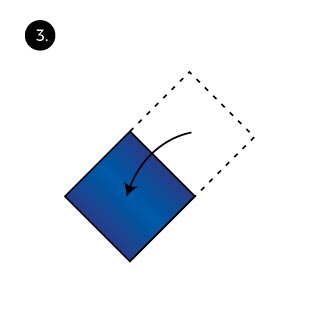 Fold in half again to create a smaller square.
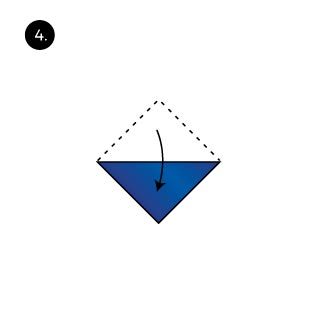 Fold down one side to create a small triangle.
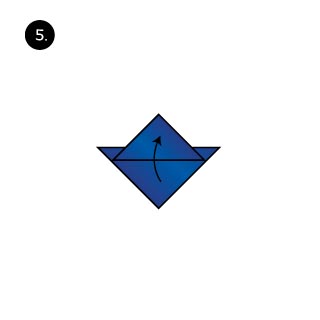 Fold up one of the leaves. Fold just below the long end of the triangle.
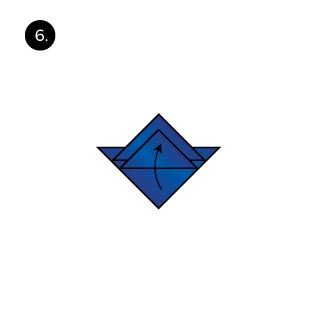 Fold up the second leave. Leave it about 1/2 inch below the previous fold.
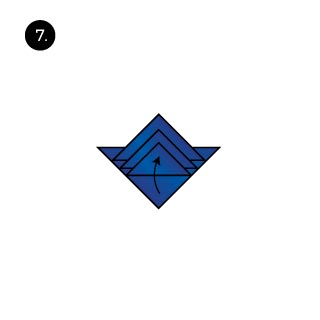 Now do the same with the third leaf.
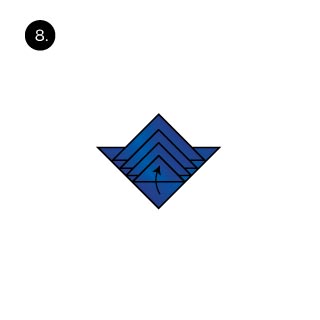 And one last time with the fourth leaf.
 Fold in half at the center. The leaves or “sails” should be on the outside.
 At last, tug the pocket square into your breast pocket.
Day 48: Christmas Tree Fold

If you like the Diamond Fold, then you will certainly like this so-called Christmas tree fold. Although I very much like this fold, I usually reserve it for the Holiday season. To fully embrace the season, I usually use a bright red (as shown) or hunter green pocket square. Here is how you create this fold:
Christmas Tree Fold Step-by-Step:
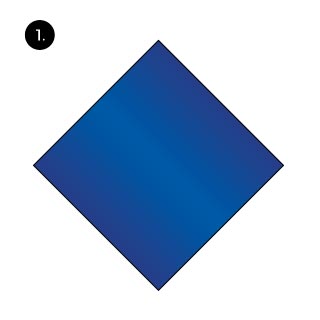 Lay the pocket square down flat.
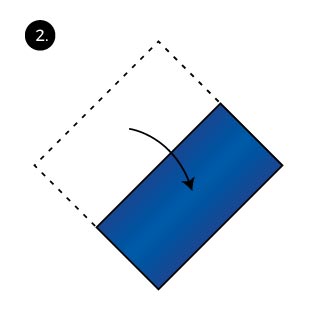 Fold in half to create a rectangle.
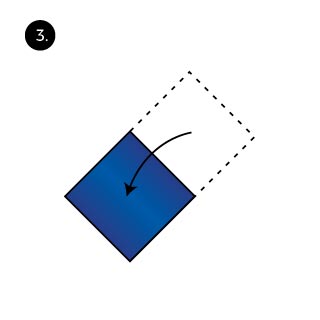 Fold over again to create a square.
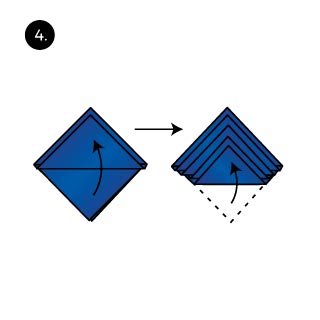 Take the corner with all the open tips and start folding up each leaf. With each fold, end about 1/4 inch below the previous fold.
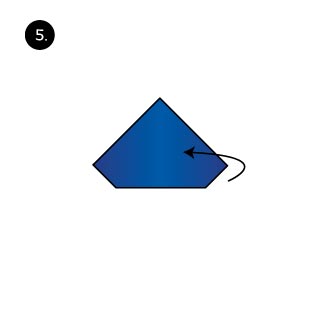 Turn the pocket square over.
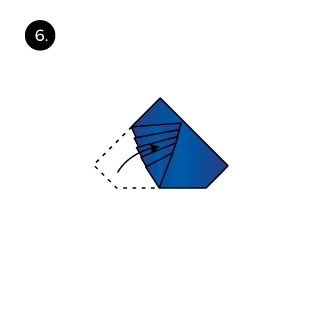 Fold one corner up.
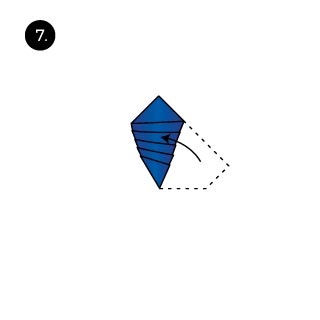 Do the same with the opposite side.
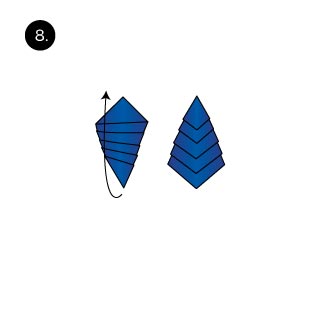 Turn the pocket square 180 degrees. it should start looking a bit like a Christmas tree.
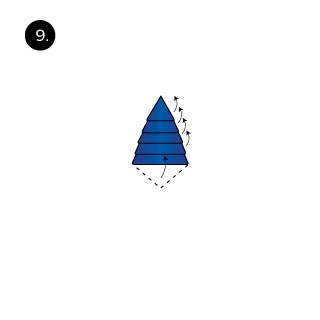 Starting from the top, fold back each of the leaves.
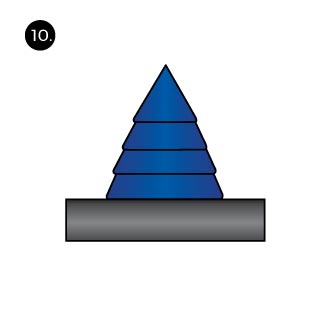 At last, neatly place the tree into your breast pocket.
Day 47: Bishop’s Hat Fold

The Bishops Hat is the only fold that spreads the pocket square above, below, and to all sides of your breast pocket. Because of the size and the spread, it is quite a loud fold. It is suitable for any pocket square style, although I suggest a bright and loud pocket square to compliment the eccentric nature of this unusual fold. Here are the 11 steps to create this fold:
Bishop’s Hat Fold Step-by-Step:
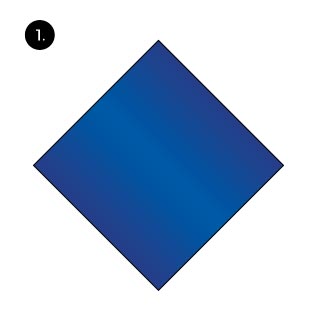 Lay the pocket square down flat.
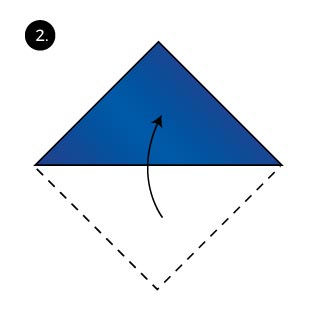 Fold it into a triangle.
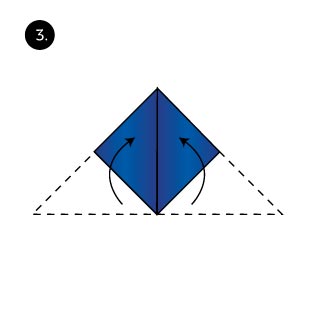 Fold up the outer corners to meet the top of the triangle. This creates a square.
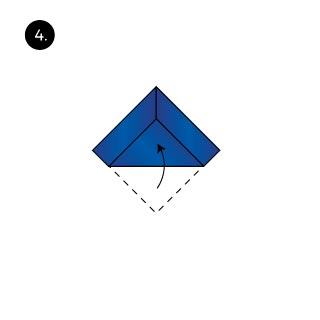 Now fold in a portion of the lower corner.
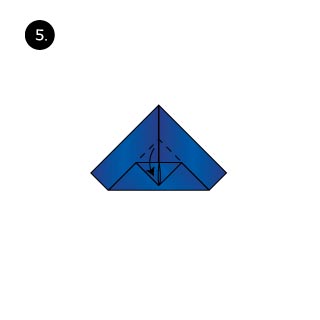 Fold down the tip of the inner triangle.
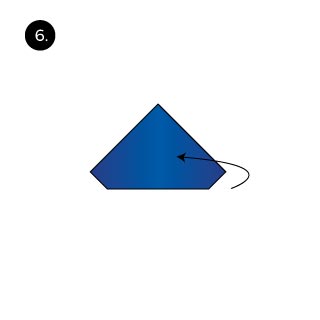 Turn the pocket square over.
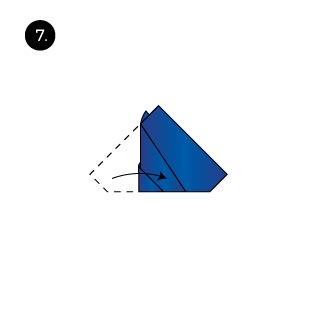 Fold in one of the sides.
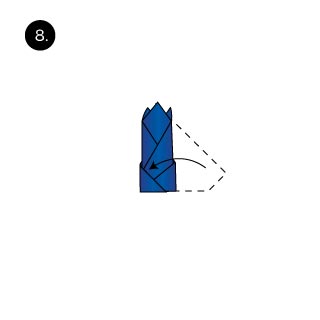 Fold in the other side and tug the corner in to keep the fold secure.
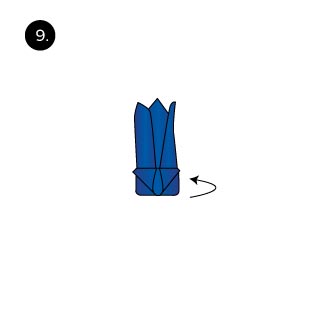 Turn the pocket square over again.
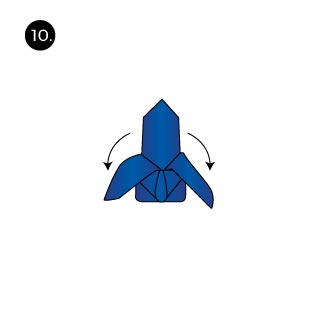 Fold down the outer tips.
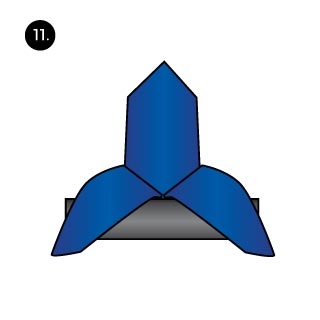 At last, tug into your breast pocket and style to suit your liking.
Day 46: Rolled Rose Fold

Flowers have always been an inspiration for pocket square folds. As part of our 50 pocket square folds series, we have seen folds such as the simple rose fold, the double rose, the pistil flower, and many more. More often than not it is the pocket square that replaces the boutonniere and/or lapel flower for formal dress codes. Here are instructions on one of my favorite floral inspired folds, the rolled rose:
Rolled Rose Fold Step-by-Step:
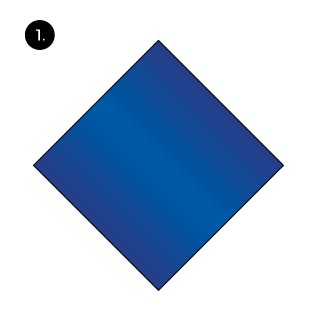 Lay the pocket square down flat.
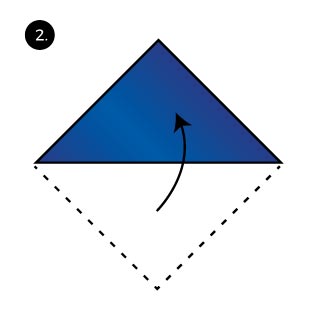 Now told it into a triangle.
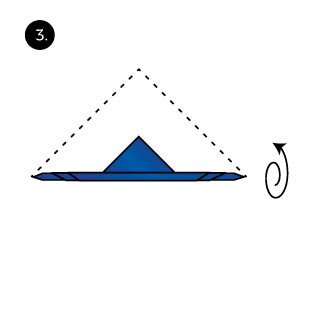 Roll up from the long side of the triangle but leave about 2 inches of the top.
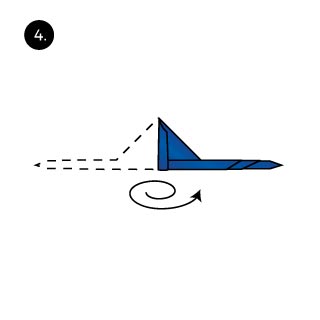 Now start rolling from one of the sides.
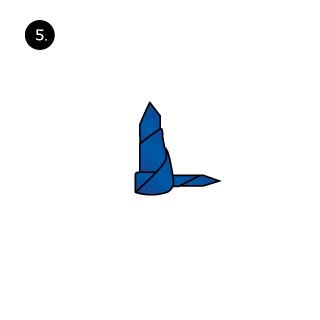 Roll up but leave about 2 inches of one side.
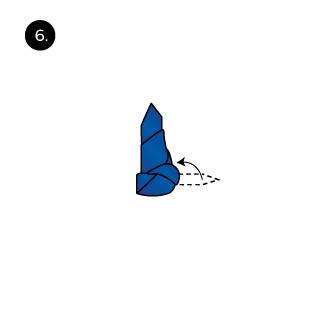 Take this left over piece and tug it into one of the wrappings. This secures the roll.
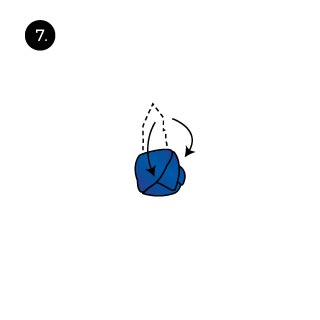 Pull down the upper portion to create the two leaves of the rose. There should be two pieces that are pulled down next to the actual rose blossom.
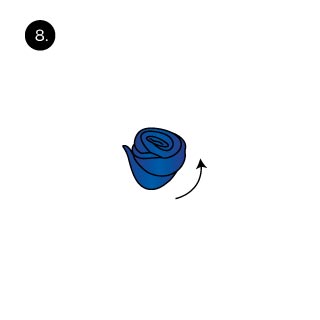 Turn the pocket square around.
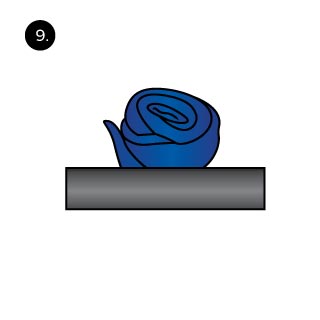 Place into your breast pocket and style to your liking.
Day 45: Ship Fold

The ship fold shown here is a close relative to the Sail fold which will be featured later this week. It is a simple and neat fold that looks best with all your solid colored pocket squares. Here is how you create this elegant fold:
Sailing Ship Step-by-Step:
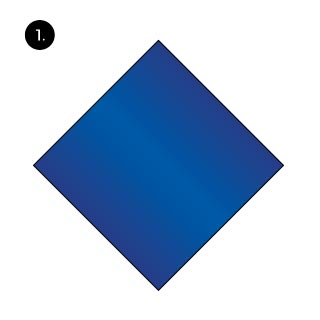 Lay the pocket square down flat.
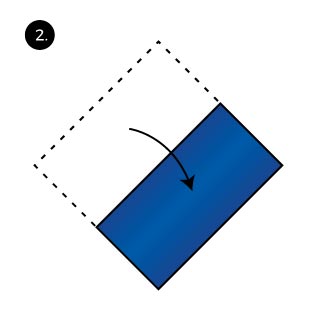 Fold in half to create a rectangle.
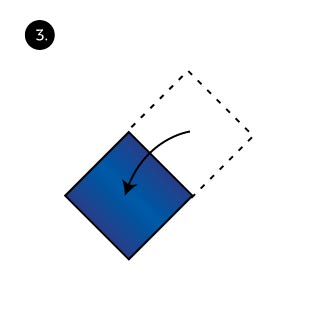 Fold in half again to create a square.
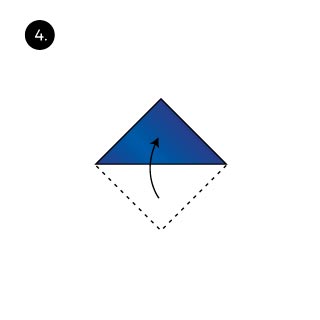 Fold up one corner to create a small triangle.
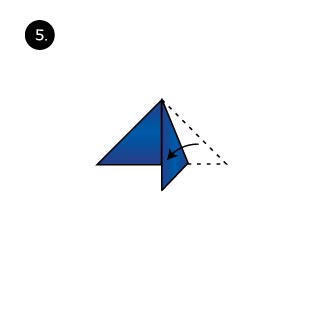 Fold in one edge to the center line of the triangle.
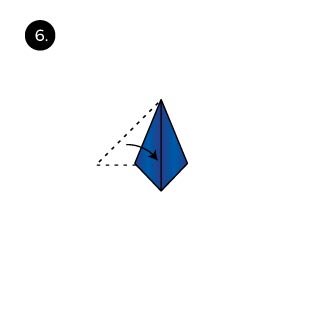 Do the same with the opposite edge. Now the pocket square looks pointy like an arrow.
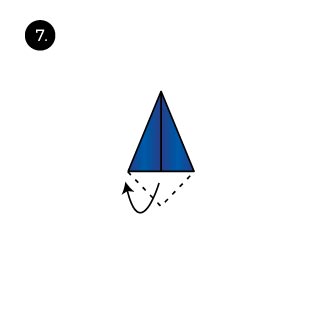 Fold back the lower side to create a pointy triangle.
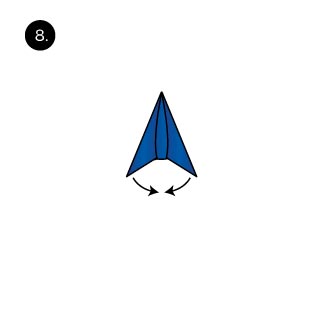 Now fold the triangle in half with the folds being on the outside.
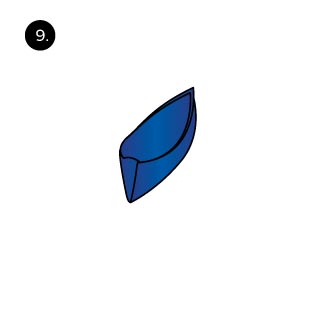 Open up the fold. It should look like the hull of a boat.
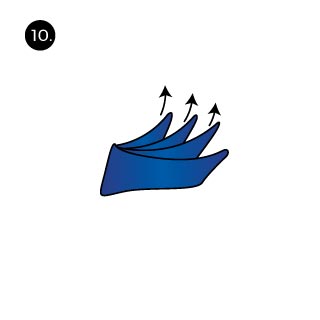 Now pull out each of teh inner 4 leaves
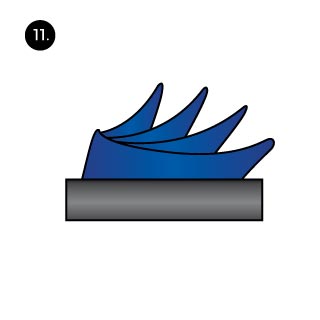 At last, place the pocket square into your breast pocket and style to your liking.
Day 44: 3 Petals Fold
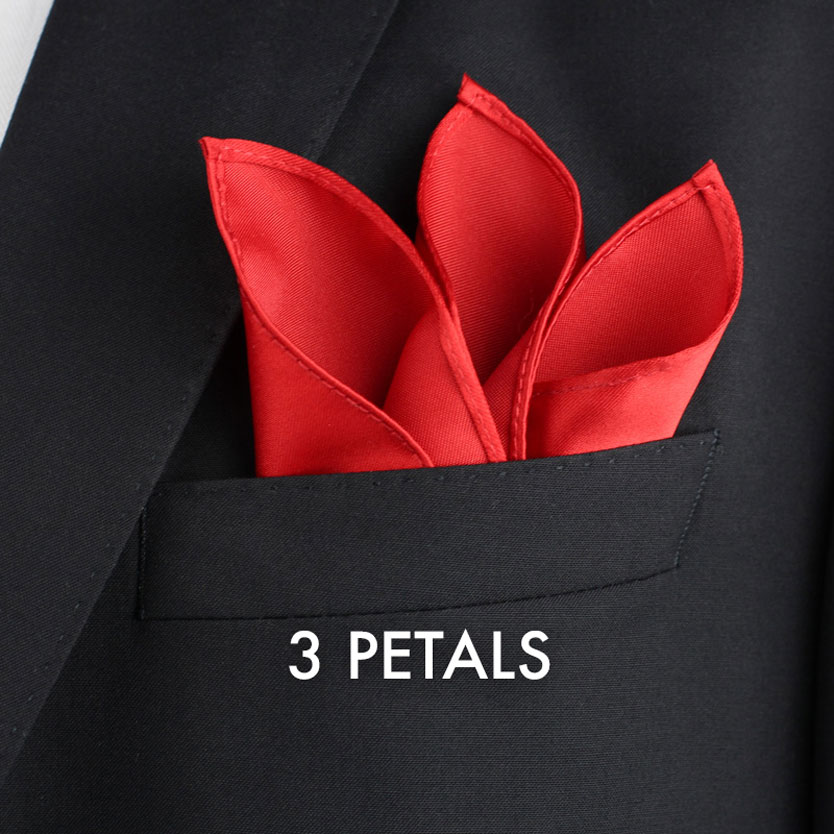
If you are already a fan of the Fleur de Lis Fold as well as the Rabbit Fold, then you will most certainly like this one here. It is a fantastic fold for slightly larger squares made from silk. I prefer to wear this fold with solid colored hankies although any patterned one would certainly work well. Here is how you create this fold:
3 Petals Fold Step-by-Step:
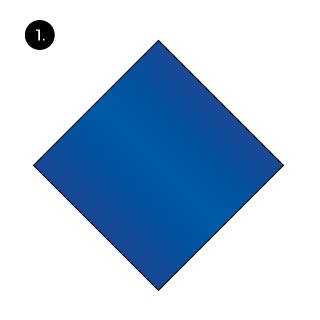 Start by laying your pocket square down flat.
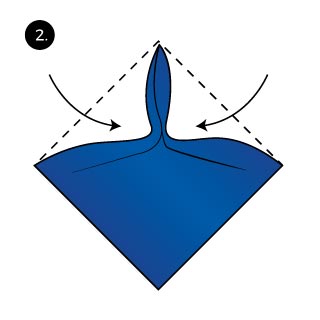 Next, pinch two sides to create the first petal at the center.
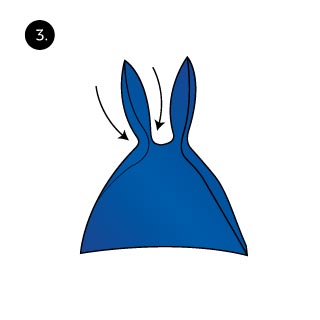 Now pinch another side to create the second petal.
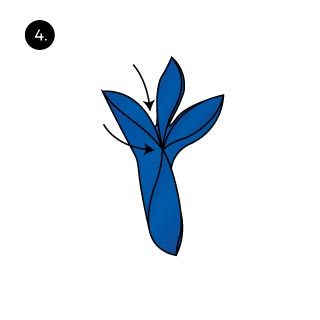 And once again, pinch a third side to create the third and final petal.
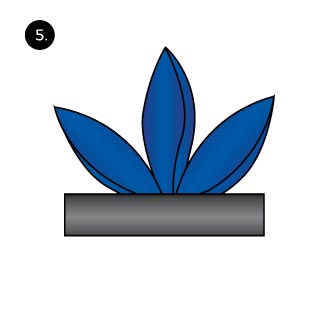 At last, place the pocket square into your breast pocket with the three petals sticking out evenly.
Day 43: Rabbit Fold
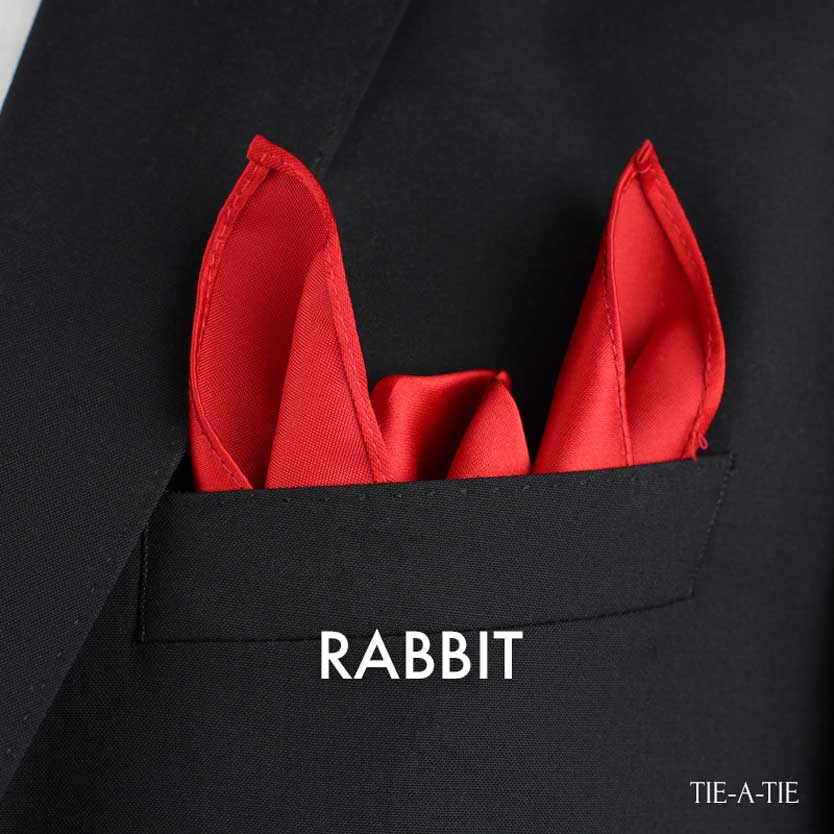
As the name already suggests, the rabbit fold, looks like you have the bunny rabbit hidden in your breast pocket. But, you don’t have to be a magician to wear this fun fold. It looks fantastic with solid and patterned squares alike. Should it be a bit too eccentric, then you may want to consider the Two Point Puff fold instead. Here are instructions on the rabbit fold.
Rabbit Fold Step-by-Step:
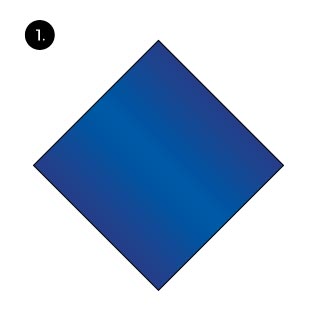 Lay the pocket square down flat.
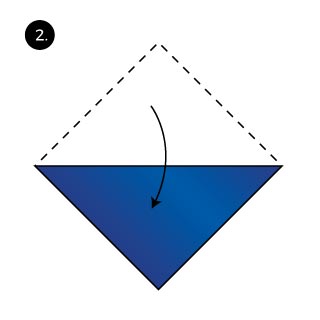 Fold in half to create a triangle.
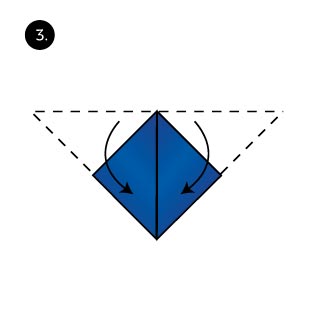 Fold down both corners to create a rectangle.
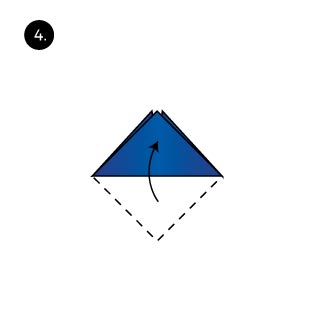 Fold up the bottom corner to create a small triangle again.
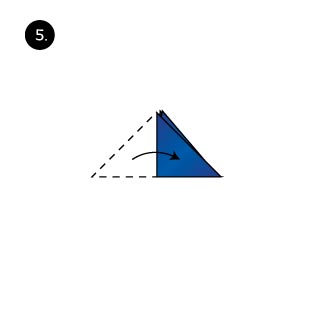 Fold over one side to create an even smaller triangle.
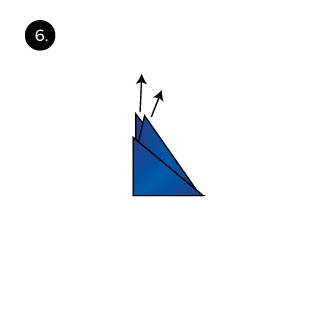 Now pull out the two inner corners.
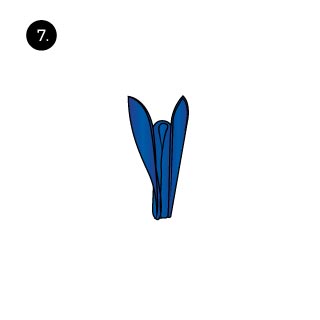 Open up the fold carefully.
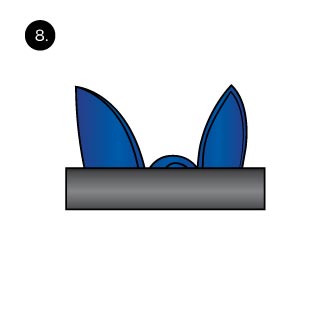 At last place the pocket square into your breast pocket. Pull out the two ears more and make sure that some of the center is showing. That’s all.
Day 42: Double Winged Puff Fold

The double winded puff fold combines the overcoat fold with the winged puff. It requires the use of two pocket squares that are preferably similar in size. Here is how you create this unusual fold:
Double Winged Puff Fold Step-by-Step:
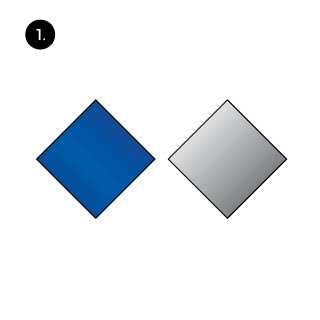 Lay noth pocket squares down flat.
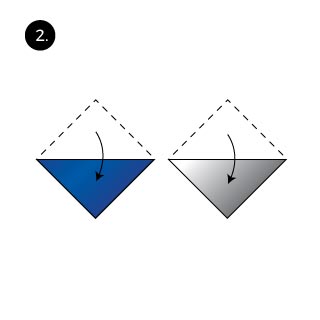 Fold both in half to create two triangles.
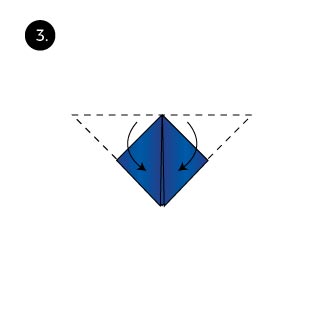 Now take the pocket square that you want in the center and fold down both tips of the triangle to create a rectangle.
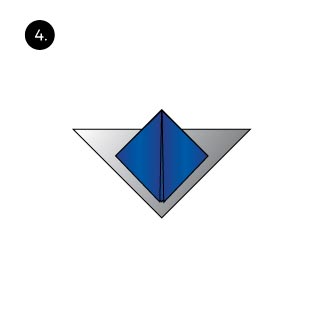 Lay the rectangle on top of the triangle. The rectangle should be about 1 inch higher than the triangle below.
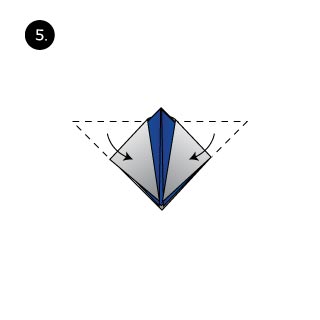 Fold down the wings of the triangle. This wraps the rectangle.
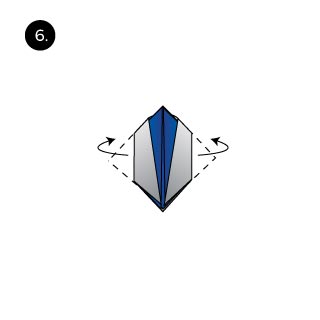 Fold back the right and left corner of the square containing both pocket squares. This is done to adjust the size so that the fold fits into your breast pocket.
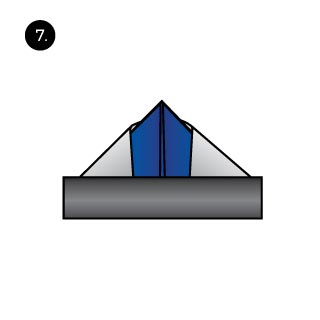 At last, tug the completed fold into your breast pocket.