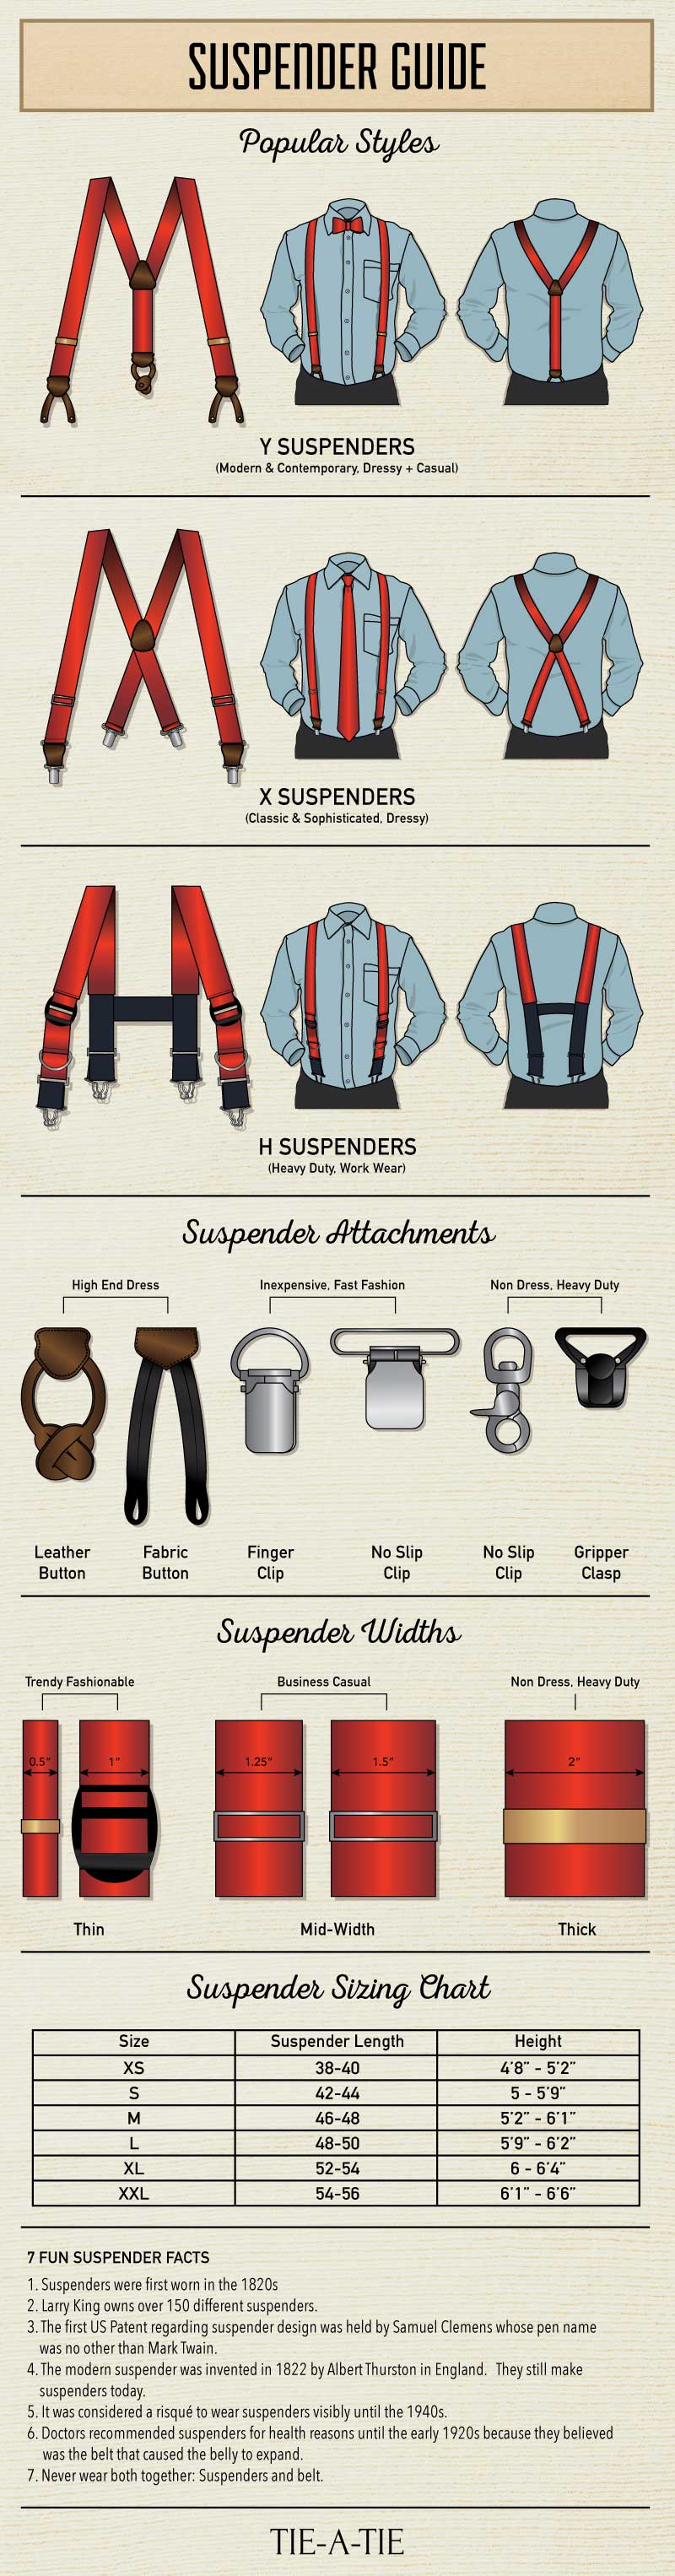
Has this happened to you? You are packing for a business trip but don’t want to take your favorite ties with you out of fear they will get damaged or wrinkles? What’s the point then of having these fancy ties? Don’t you want to look your best and dress to impress for those important business meetings out of town? What you need is the right tie travel case! Below are some tie storage and travel accessories that will not only make sure your ties look like new for years to come, but many of these accessories will also help you organize your tie collection. Read below the graphic to learn the pros and cons for each style.
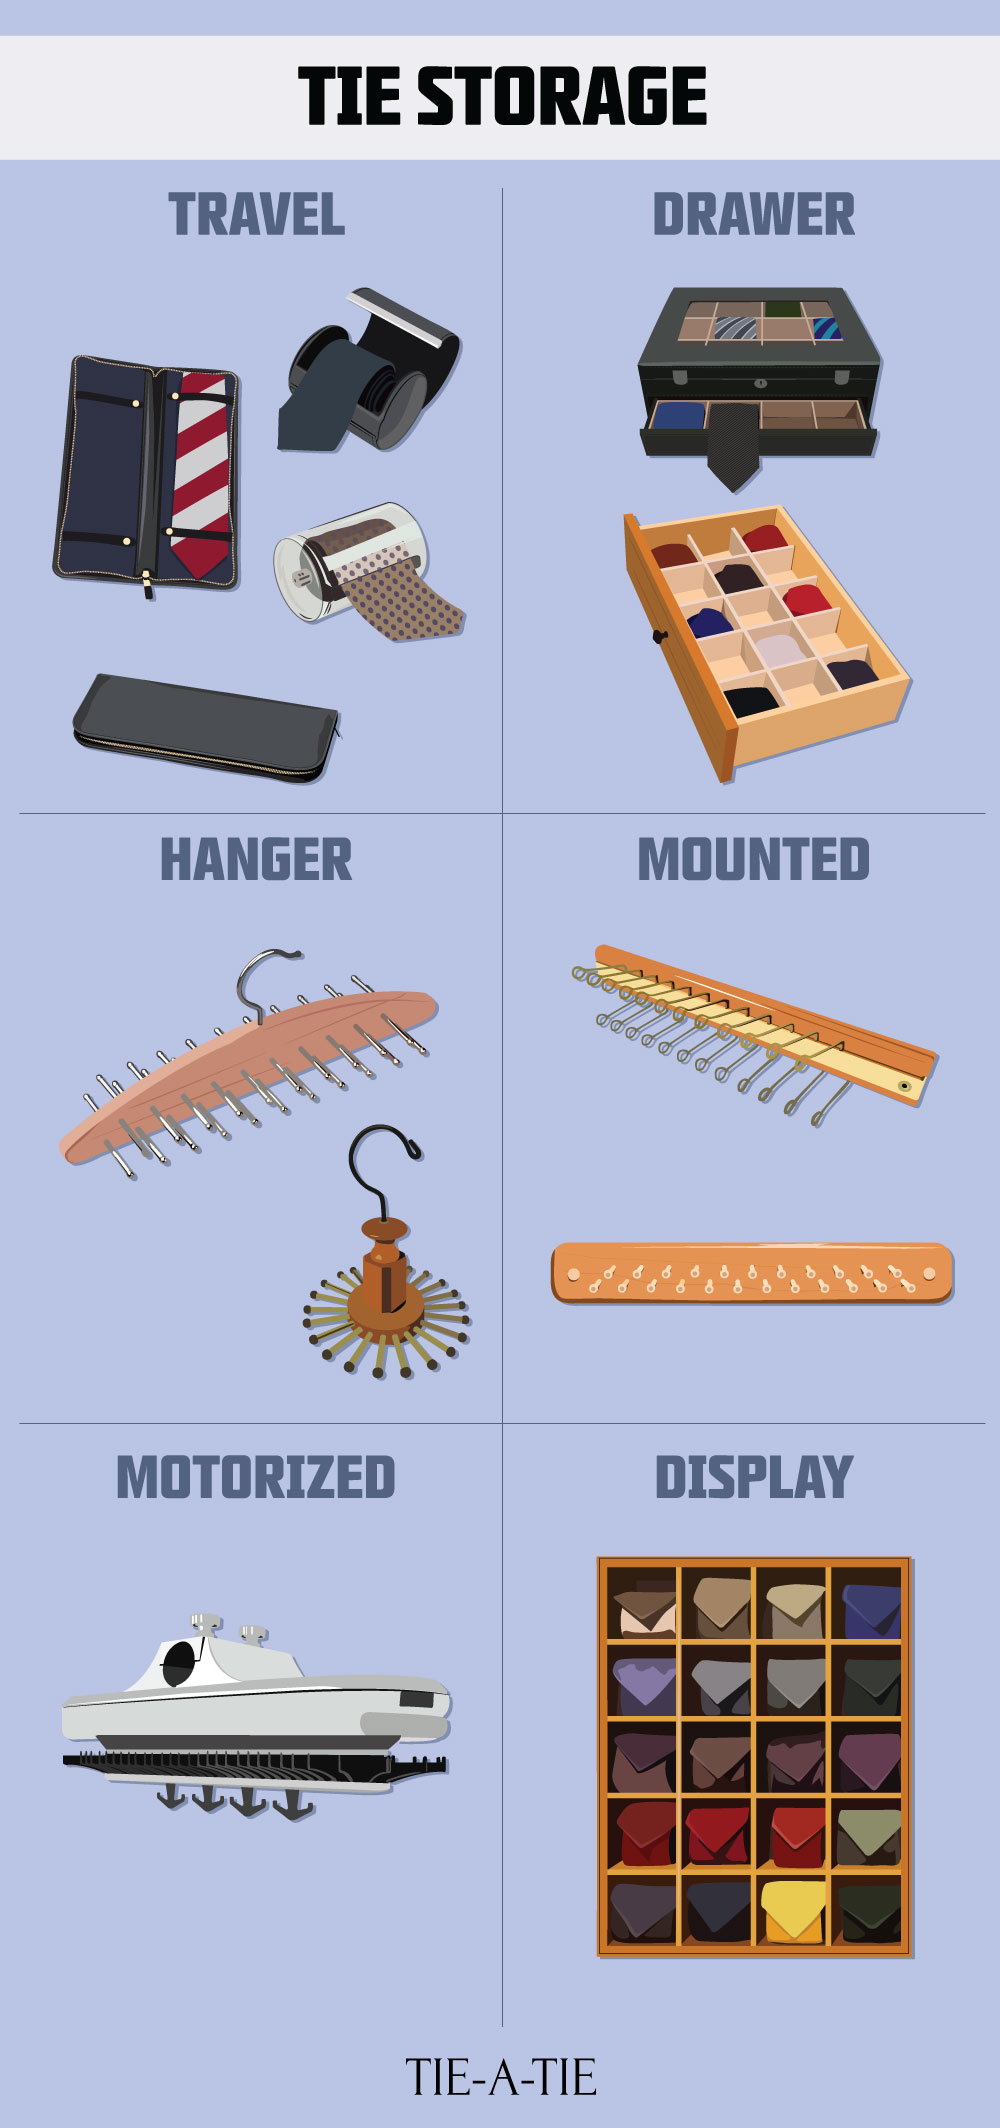
Travel Cases
A proper tie travel case is a must have item for anyone who regularly travels with suit and tie. Personally I prefer foldable leather cases that typically hold 2-4 ties. They range from $20 (when made from nylon) to a few hundred dollars when made from exotic leathers with brand name attached. Because these are classic pieces that will never go out of style, they make for a perfect gift as well. One of my favorite ones is this one here by Mark and Graham.
Besides these leather travel cases, there are also cylindrical cases designed for single ties. Most of them are made from leather or plastic and are closed with a snap or magnet. Leather is preferred over plastic as plastic cases can break easily. Personally I am not a fan of either.
Hanging Organizers
If you own more than a handful of ties, but less than 30 ties, then I suggest you invest in a simple hanger style tie organizer. They are available in all kinds of shapes, but I would recommend one that isn’t too long as, is relatively flat, and made from cedar wood. A shorter length (less than 10 inches) keeps it balanced better even when ties are not spread out evenly. A shallow width helps in taking up less room in your closer, and the cedar wood is a great repellant against moths who love to eat silk fabric. This one here by Allen Edmonds is my personal favorite.
Mounted Displays & Racks
Are you a tie aficionado who loves to collect fancy neckwear? Then you probably own 50 or even hundreds of ties. If that is you, then a hanging tie rack won’t cut it. You need something that holds more ties, is easier to organize, and holds your ties better. A mounted rack is the way to go. This one here is perfect! While it only holds 24 ties, you can easily install several in a row or below each other. I have mine installed inside my closet door.
If you love your ties so much that you wish you could wear multiple ties each tie, then you may also want to consider one of these wall mounted cubby shelves. While typically only seen for store displays, they can be a piece of colorful art in your walk-in closet.
Drawer Inserts
Personally I am not a big fan of using drawer inserts as most of them require you to roll your ties and then placing the cylinder shaped roll upright. This can negatively impact the shape and drape of the tie. But, if you have an extra drawer available, have limited hanging space, and are tired of your ties falling off from the tie rack, then a drawer insert might be right for you. Choose an flexible fabric insert that is adjustable to fit a wide range of drawers. This one here by the Container Store is a good option that can be adjusted to fit a wide range of drawer dimensions.
Motorized Organizers
Do you love to read Sky Mall, step into a Brookstone store every chance you get, and are a sucker for gadgets in general? Then you might be the right candidate for a battery powered rotating tie rack. They typically mount on a clothing rod and hold upwards of 30 ties. Most of these racks also have an LED light. The downside of these racks is that they require you to change batteries occasionally, they take up much real estate on your clothing rod, and they tend to break easily as most of the ones I have come across are cheaply made. Still convinced that you want to organize your ties this way, then I found a good option here on Overstock.com.
Other Suggested Articles
General Tie Tips
Silk Tie Cleaning Tips
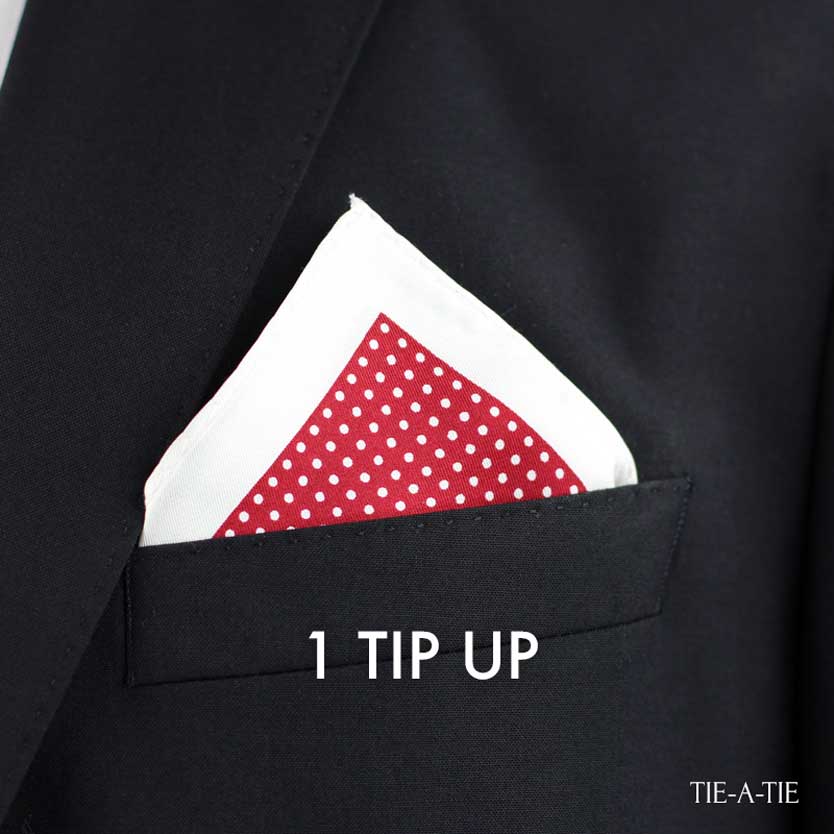
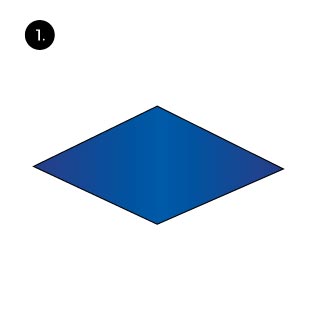
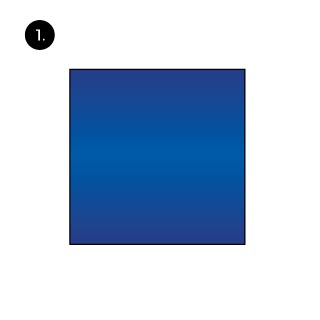
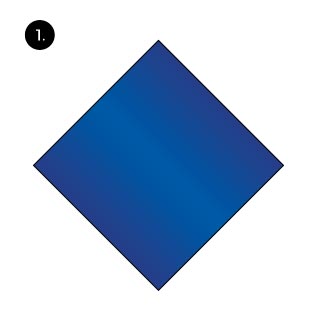 Lay the pocket square down flat.
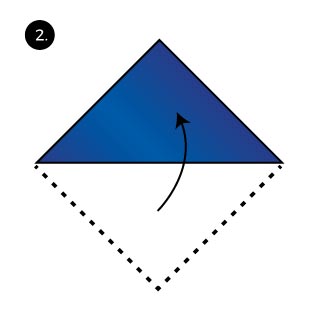 Fold one corner to create a triangle.
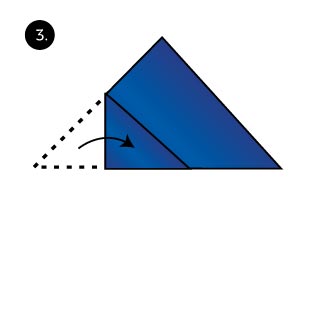 Fold in one of the sides.
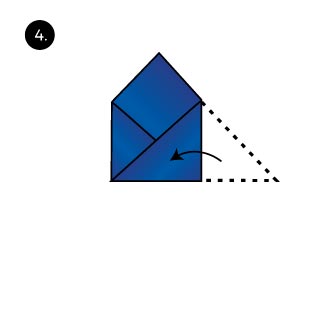 Now do the same with the other side. This is what the “1-tip up fold” looks like when not tugged into your breast pocket.
 Last, place the pocket square into your breast pocket. Give it a final styling to suit your liking.
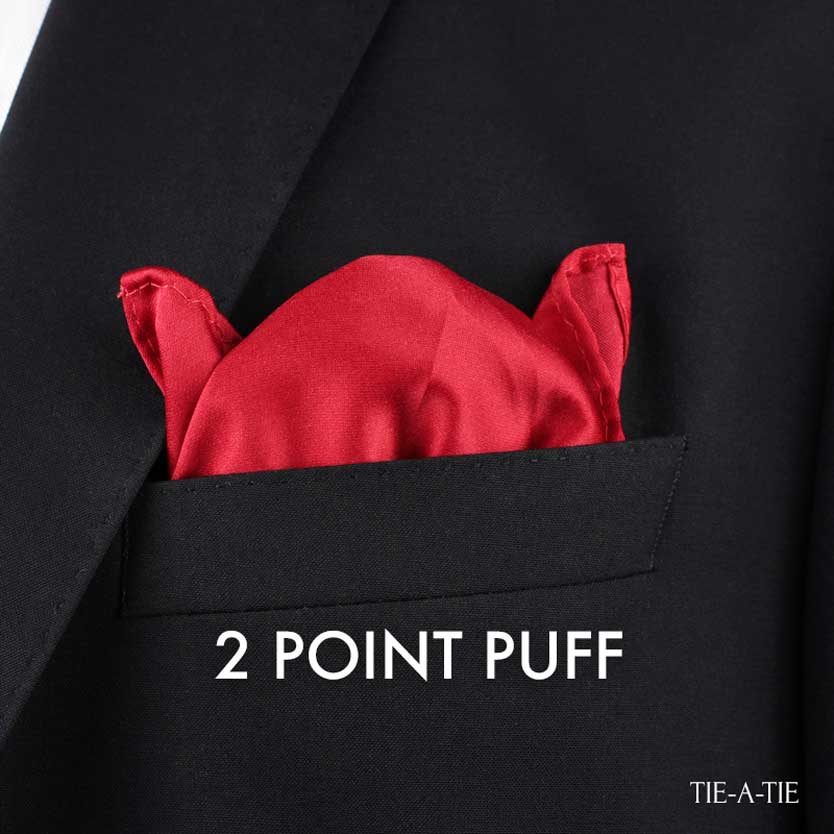
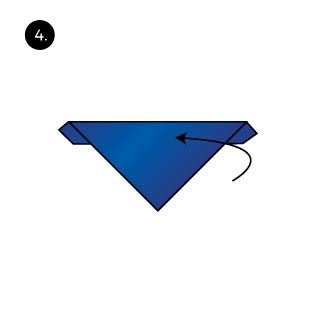
 Lay the pocket square flat. Make sure it doesn’t have any wrinkles or creases.
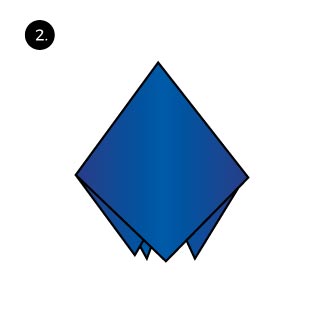 Pinch the center and pick up the pocket square.
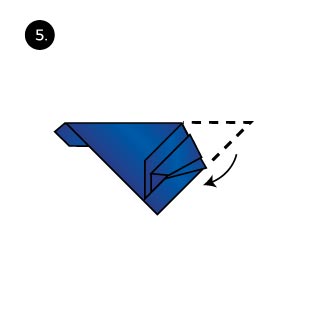
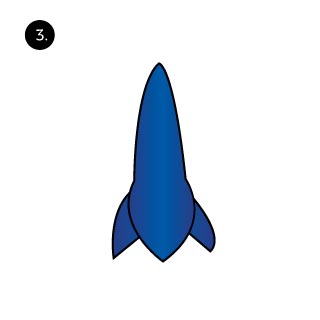 Slide the pocket square through your other hand to “puff” the center that is pinched by your fingers.
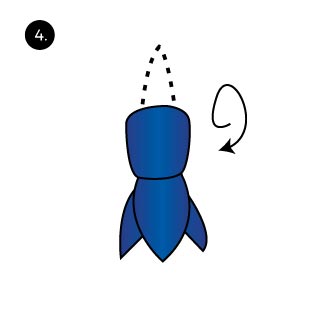 Push down the center to create a looser “puff”.
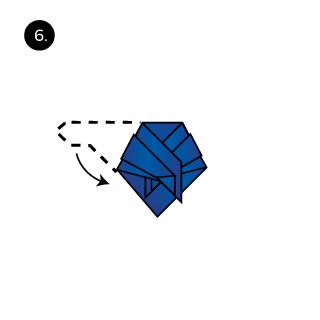
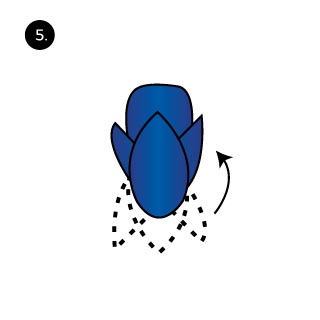 Now turn the pocket square upside down so that the corners are facing up.
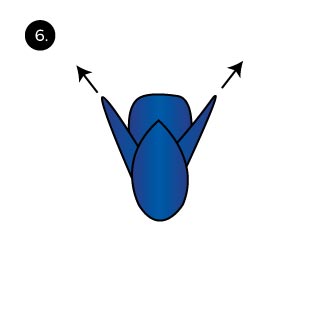 Pull out two of the outer tips so thy extend higher than the other corners.
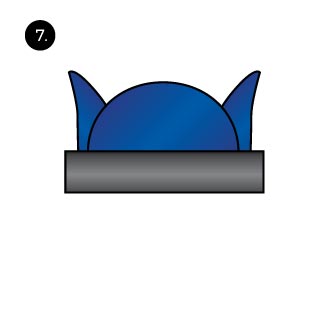 Last, stuff the pocket square in your breast pocket. Finish styling it to make sure the tips face outwards from the puffed dome. That’s all.
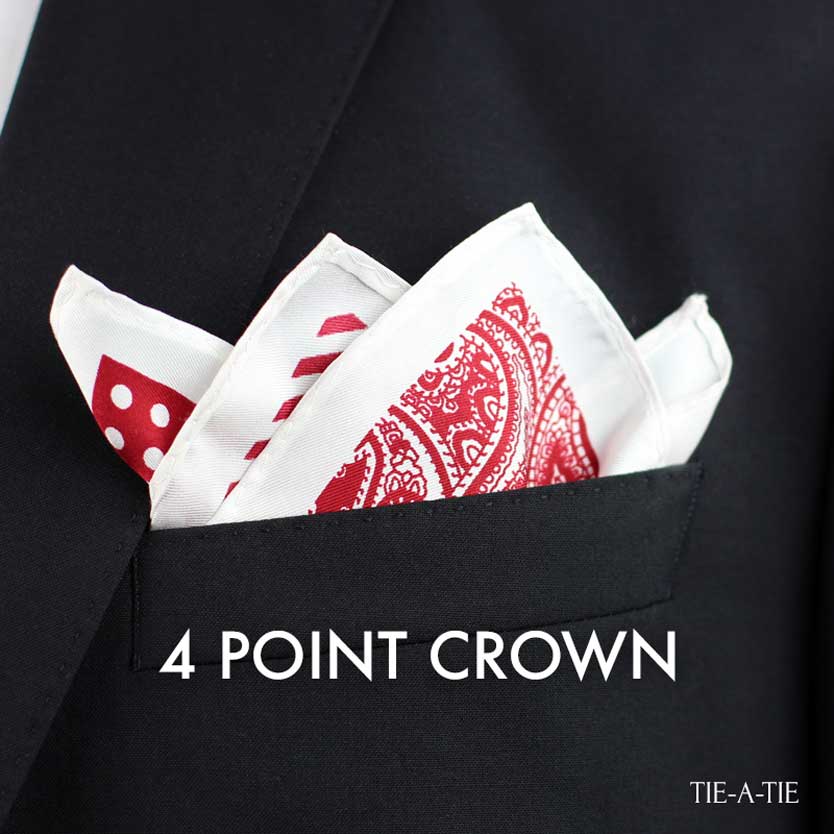
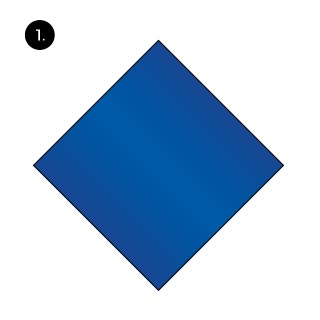 Lay the pocket square flat.
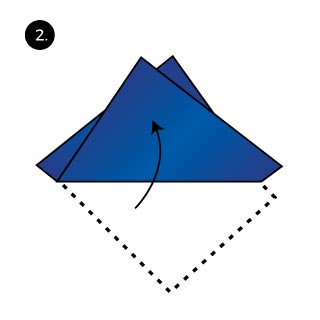 Now fold one corner up to create two overlapping triangles.
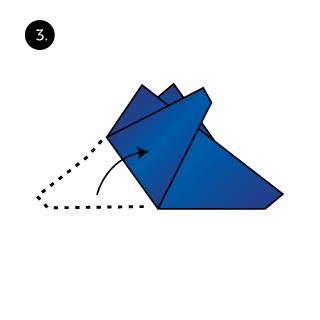 Fold in one side to create the 3rd point that will be showing.
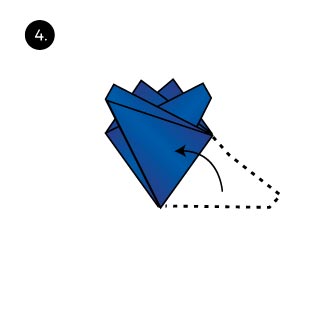 Next, fold over the opposite side. This creates the 4th point and the crown is complete.
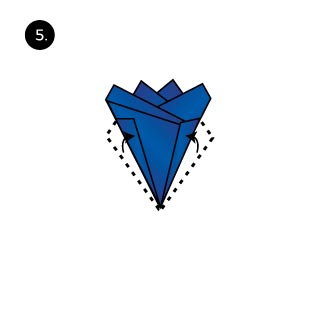 This is what the 4-point crown fold looks like when complete before tugging it into your breast pocket.
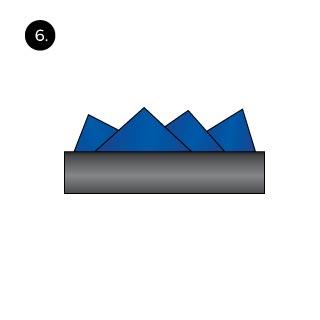 Lastly tug the pocket square into your breast pocket so that all 4 points are showing. That’s all!
 Lay the pocket square flat.
 Start rolling from one corner. Roll until you rolled up about 2/3 of the pocket square.
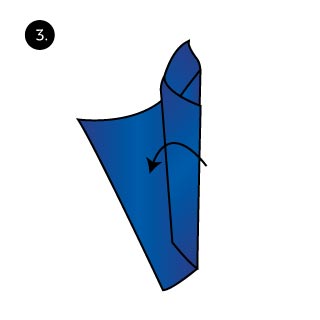 Hold the larger roll in place.
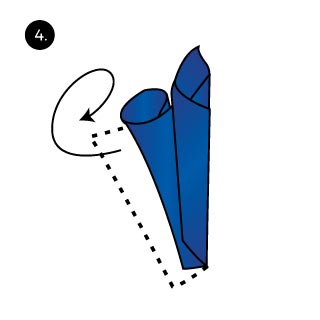 Now roll the opposite side under.
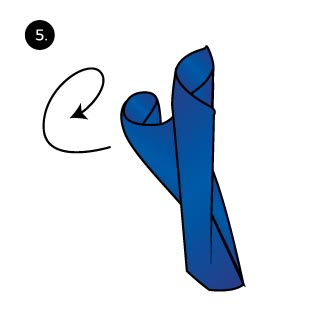 Roll all way way until you connect with the larger tube.
 Last, tug your Catta Lily folded pocket square into your breast pocket. That’s everything!
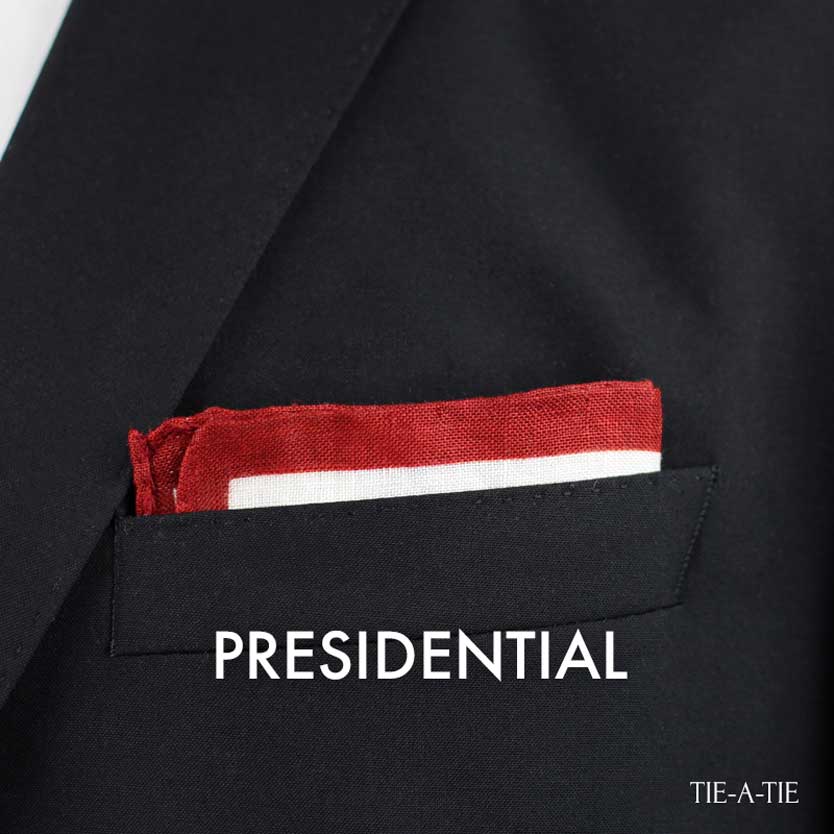
 Lay your pocket squares flat. Make sure it is free of wrinkles.
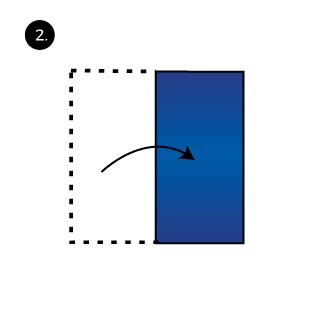 Fold one side over at the center to create a long shaped rectangle.
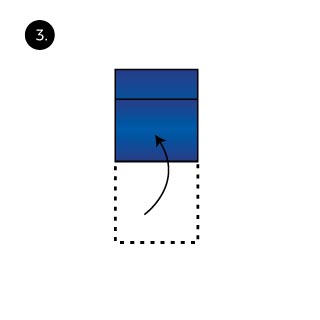 Now fold the long side over so that it ends about a 1/2″ short of the other side.
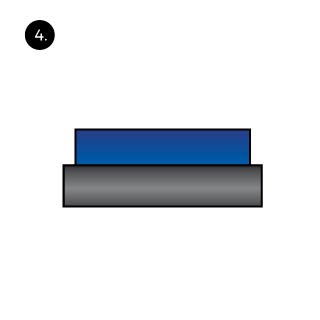 Now tug the pocket square into your breast pocket so that only a quarter to half inch are showing.
 Start by laying your pocket square on a flat surface.
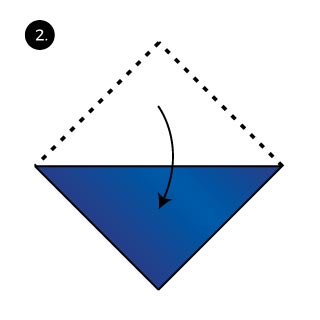 Fold one side over to create a triangle.
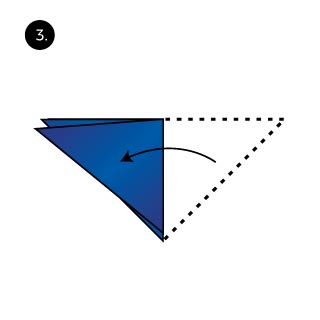 Fold it again at the center to create a smaller triangle.
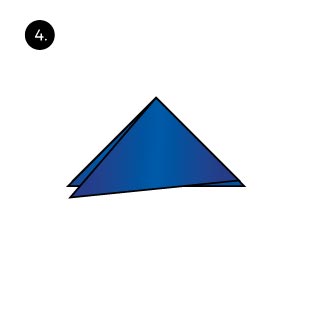 Turn the pocket square so that the longest side is facing towards you.
 Now fold the side with the open ends over.
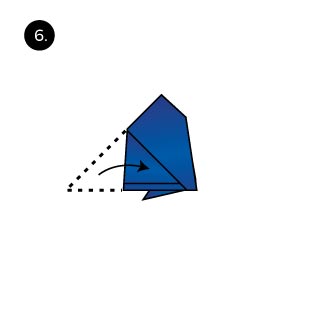 Turn the pocket square over and fold in the other side so that the fold fits into your breast pocket.
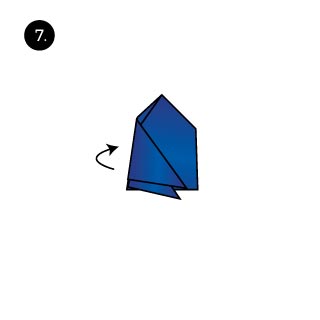 Turn it over again. The fold is complete.
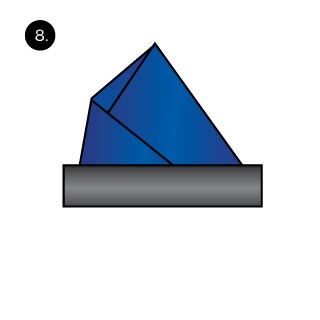 As a final step, tug the pocket squares into your breast pocket. That’s it!
 Lay the pocket square flat. Make sure it is free of wrinkles.
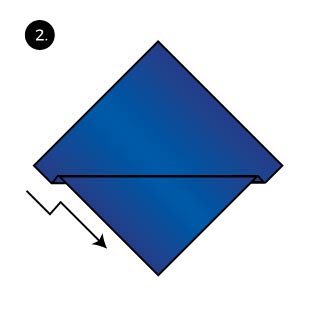 Create a double fold by folding a part of the lower triangle up, then back down.
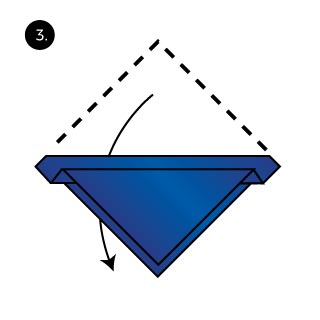 Now fold the backside under so that about 1/2 inch is still showing.