
If you like the Diamond Fold, then you will certainly like this so-called Christmas tree fold. Although I very much like this fold, I usually reserve it for the Holiday season. To fully embrace the season, I usually use a bright red (as shown) or hunter green pocket square. Here is how you create this fold:
Christmas Tree Fold Step-by-Step:
 Lay the pocket square down flat.
 Fold in half to create a rectangle.
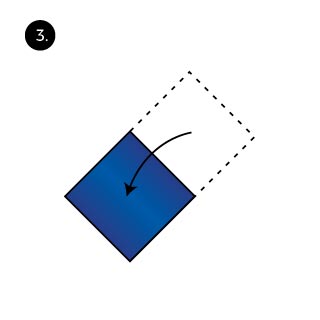 Fold over again to create a square.
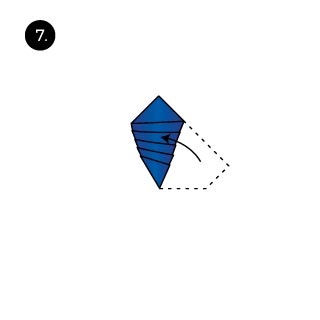
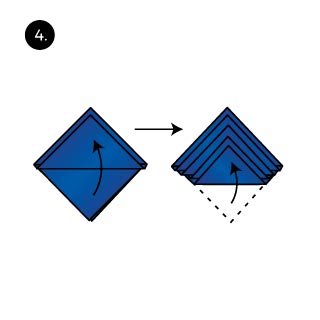 Take the corner with all the open tips and start folding up each leaf. With each fold, end about 1/4 inch below the previous fold.
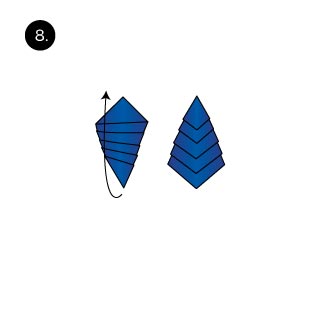
 Turn the pocket square over.
 Fold one corner up.
 Do the same with the opposite side.
 Turn the pocket square 180 degrees. it should start looking a bit like a Christmas tree.
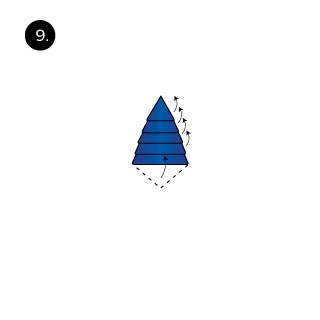 Starting from the top, fold back each of the leaves.
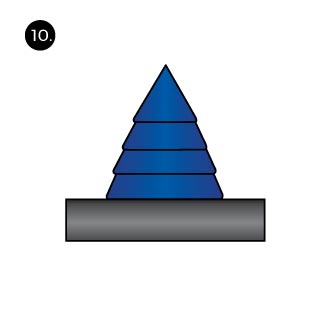 At last, neatly place the tree into your breast pocket.

 Lay the pocket square down flat.
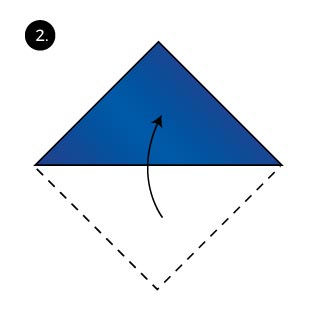 Fold it into a triangle.
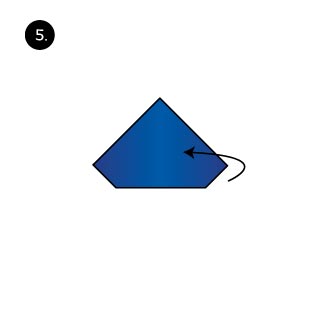
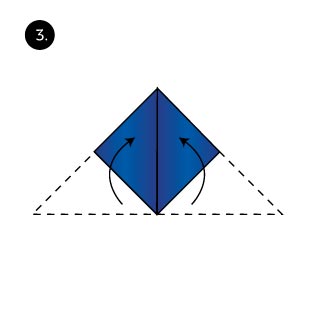 Fold up the outer corners to meet the top of the triangle. This creates a square.
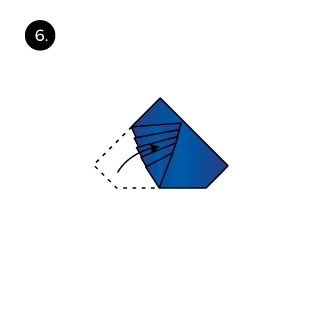
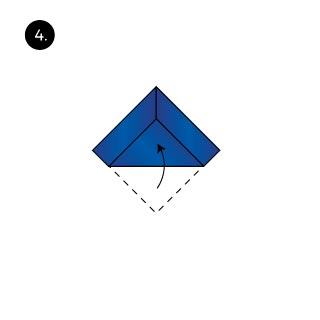 Now fold in a portion of the lower corner.
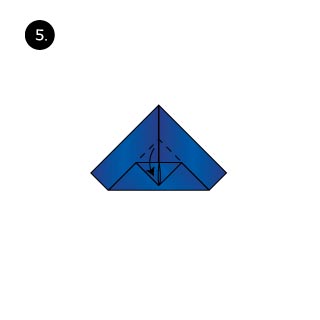 Fold down the tip of the inner triangle.
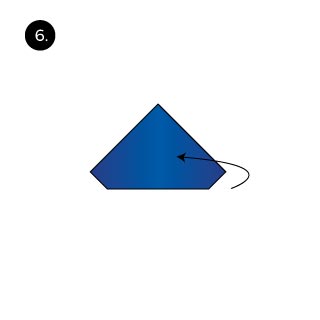 Turn the pocket square over.
 Fold in one of the sides.
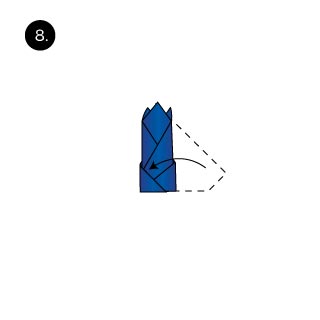 Fold in the other side and tug the corner in to keep the fold secure.
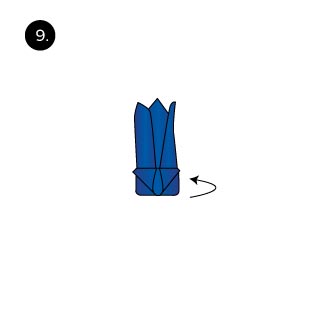 Turn the pocket square over again.
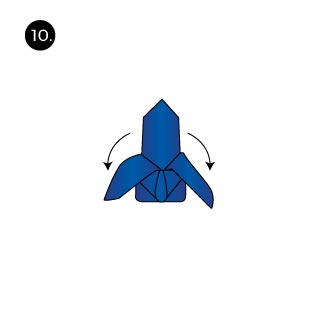 Fold down the outer tips.
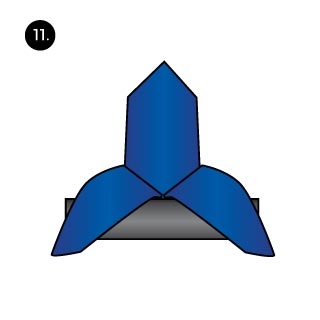 At last, tug into your breast pocket and style to suit your liking.
 Lay the pocket square down flat.
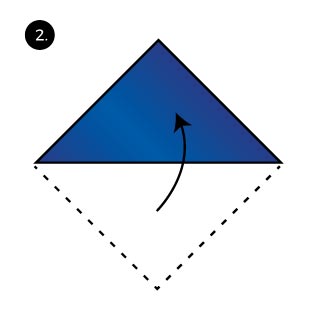 Now told it into a triangle.
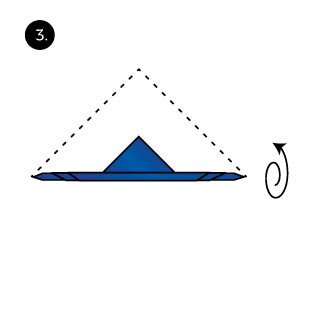 Roll up from the long side of the triangle but leave about 2 inches of the top.
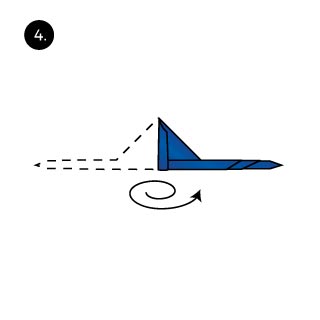 Now start rolling from one of the sides.
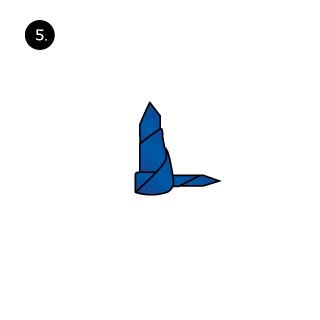 Roll up but leave about 2 inches of one side.
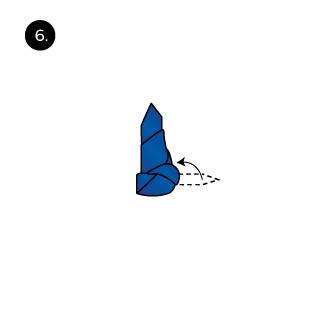 Take this left over piece and tug it into one of the wrappings. This secures the roll.
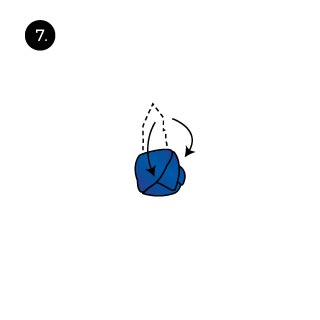 Pull down the upper portion to create the two leaves of the rose. There should be two pieces that are pulled down next to the actual rose blossom.
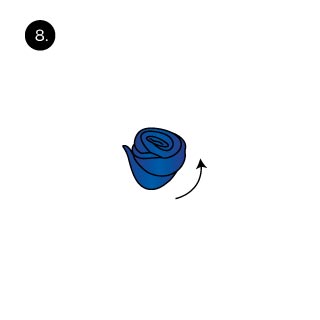 Turn the pocket square around.
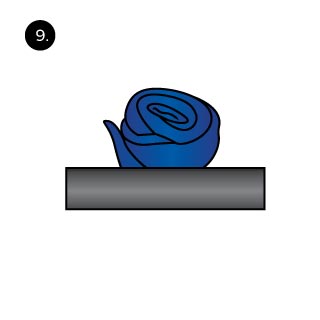 Place into your breast pocket and style to your liking.