How to Tie a Kelvin Knot
The Art of Mastering the Popular Kelvin Tie Knot
You may ask yourself: “what is the point for yet another tie knot? I already know the four in hand as well as the Windsor. Shouldn’t this be enough?” Well, for 9 out of 10 shirt & tie combinations, these two knots will work just fine. But when tying a skinny tie you may want to consider the so-called Kelvin knot. The Kelvin has a longish shape and is a bit thicker than the four in hand, while being narrower than a double Windsor. My tip for this knot: wear it with a skinny tie (2 to 2.5 inches) made from either cotton (great for summer), or worsted wool (excellent winter choice). These 5 step instructions will help you master the Kelvin knot in just a couple minutes. Print them out, tape them next to a mirror, and simply copy these 5 steps.
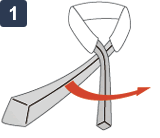 Step 1:
I suggest you practice in front of a mirror. Flip up your collar and turn your tie around so that the stitching shows. The wide should hang about 3/4 down compared to the narrow end.
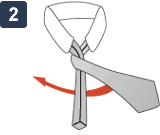 Step 2:
Create a tight wrap around the narrow end using the wider end of the tie.
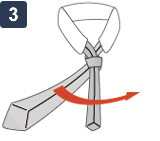 Step 3:
Create a second wrap, but this time to not pull tight. Instead leave a loop on top of the tie. This will be needed to secure the tie knot (in step 5).
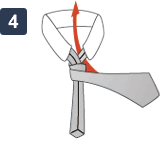 Step 4:
Take the wide end of the tie and feed it between collar and the part of the tie that goes around your neck.
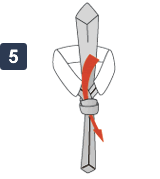 Step 5:
Last but not least, secure the knot by feeding the wide end through the loop on to of the knot. Pull tight, flip down your collar, and center the tie.