DIY Bow Tie Project

Your accessory options are endless when you’re equipped with the ability to make your own bow ties from scratch. Whether you’re looking to make the perfect Father’s Day gift, add a touch of DIY flair to your groomsman party, or showcase your own sartorial edge with quirky patterns and colors, this bow tie tutorial will show you everything you need to make your own customizable piece of neckwear. So dust off that old sewing machine and let’s get crafty!
Materials:
 1. SEWING MACHINE If you don’t already have one you can rent one at your local sewing shop (~$10-$20/day).
2. IRONING BOARD
3. IRON
4. ¼ yard Pellon® INTERFACING with iron-on backing, which you can purchase here. I used an 809 firm interfacing, but don’t go too firm or your bow tie will be impossible to tie.
5. BOW TIE PATTERN I’ve created this FREE pattern of a modern “butterfly” style bow tie. For a kid’s sized bow, ages 1-12, use this one.
6. ¼ YARD FABRIC of your choice. Cotton works best because it’s less slippery. More experienced sewers can use silk.
7. SCISSORS
8. THREAD Color should match the fabric.
9. PINS
Step 1: The Pattern
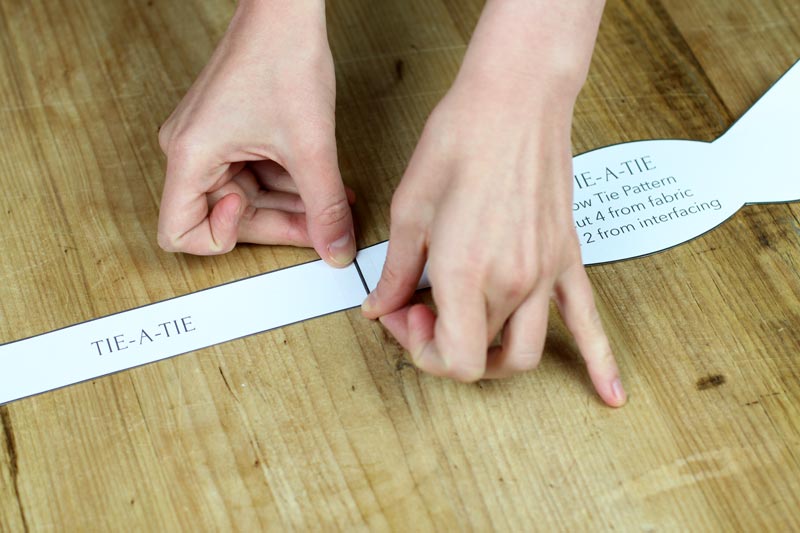
Simply print out this pattern. Be sure not to scale the image before printing. A thick paper or cardstock works best.
Cut the pattern out at your desired length according to the measurements indicated by the black lines. These lines indicate the wearer’s neck/collar size. Then tape the two pieces together so that you get a single piece that looks like this:
Step 2: Cutting and Ironing
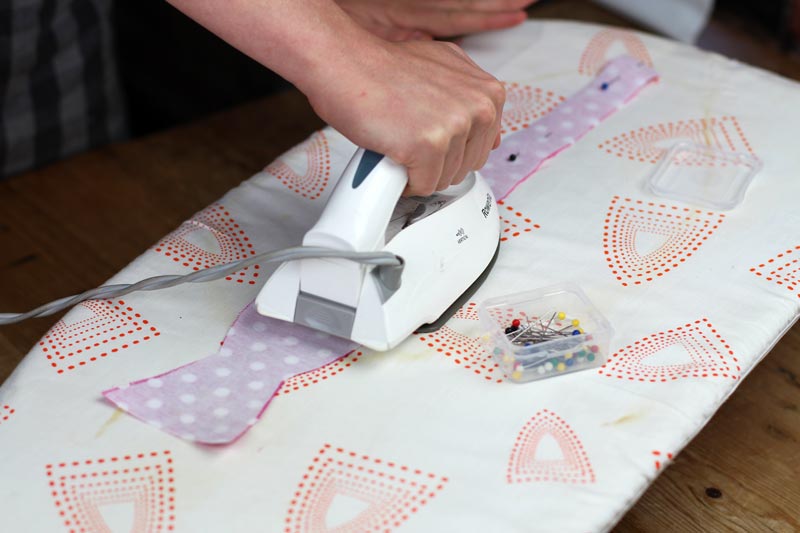
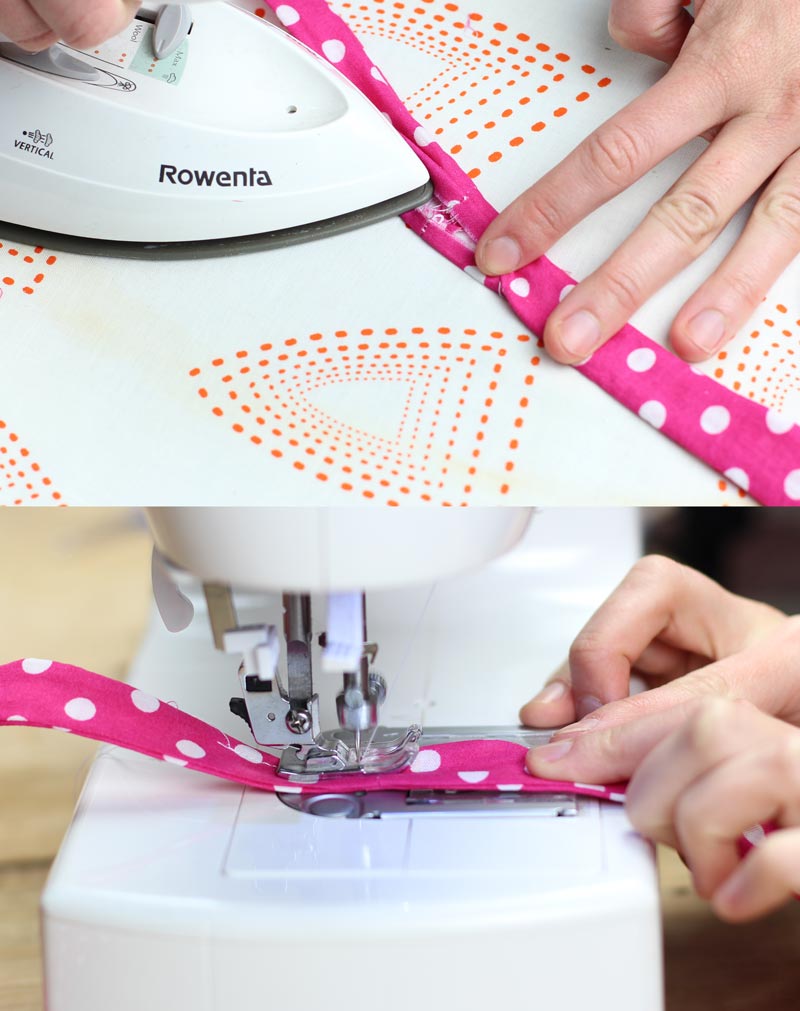
For the best results, be sure to iron your fabric before cutting to get rid of any wrinkles that could cause air bubbles when applying the interfacing. Use the pattern to cut out 4 pieces from the fabric and 2 pieces from the interfacing.
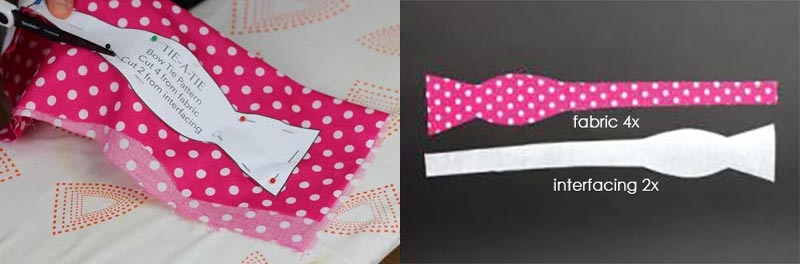
Pin the 2 interfacing pieces to the 2 fabric pieces and iron them together.
Step 3: Sewing
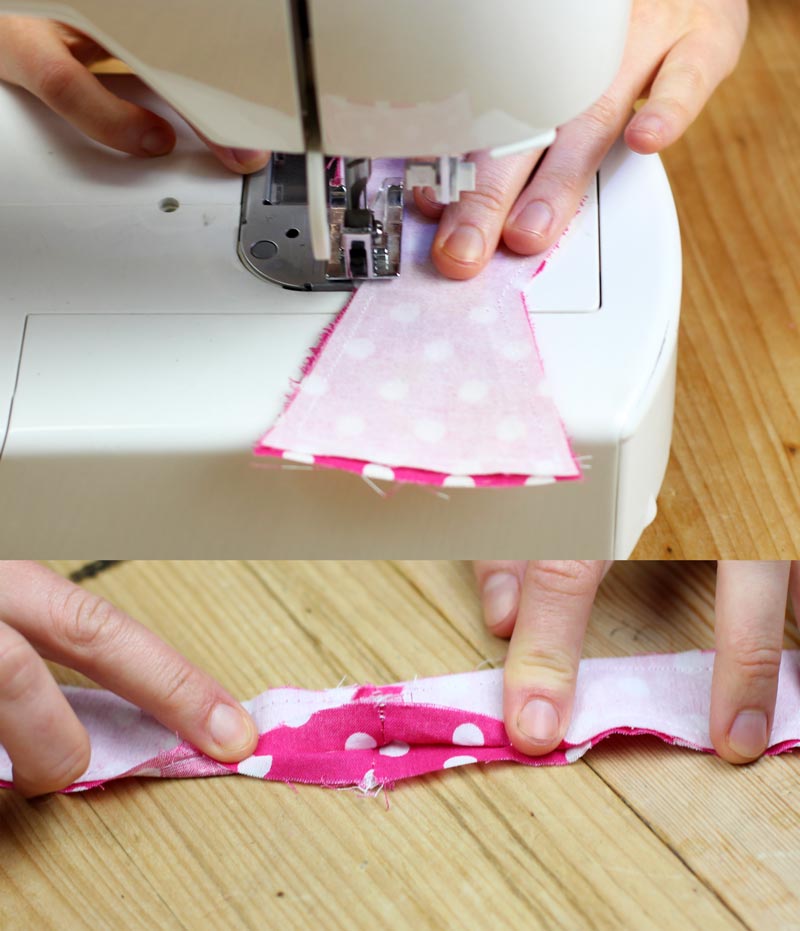
At this point you should have 4 pattern pieces, 2 of them ironed to the interfacing and 2 without. Take 2 of the matching pieces, and sew the right sides together at the skinny ends, leaving a ¼ seam allowance. Repeat with the second pair of tie pieces.
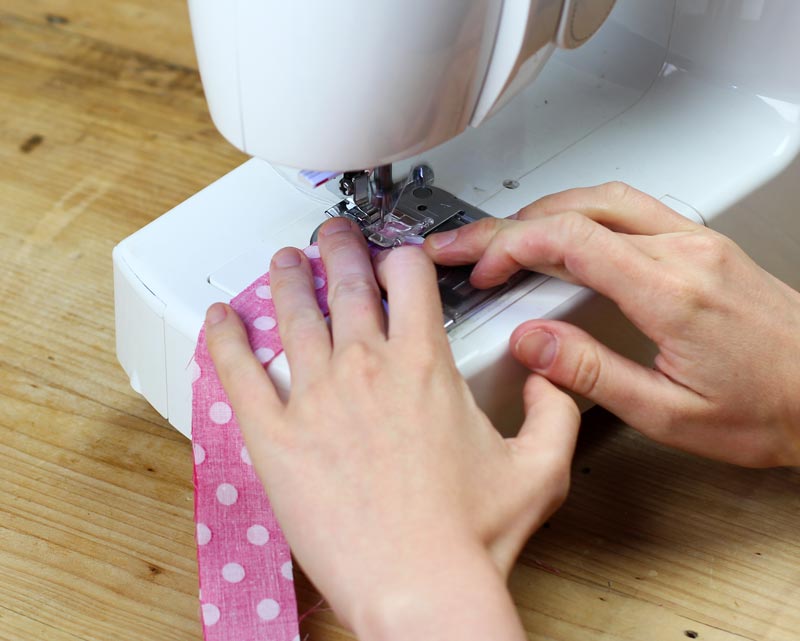
Now you should have 2 long bow tie pieces. Pin them on top of each other with the backside facing up.
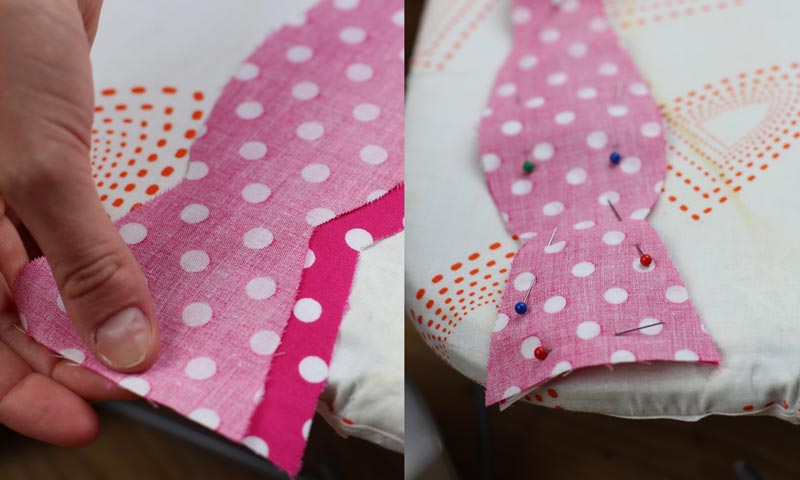
Using a ¼ seam allowance, sew around the perimeter of the tie. BE SURE TO LEAVE a gap of 3-4 inches open in the middle (as shown in the second picture below) so that you can turn the bow tie inside out when you’re finished.
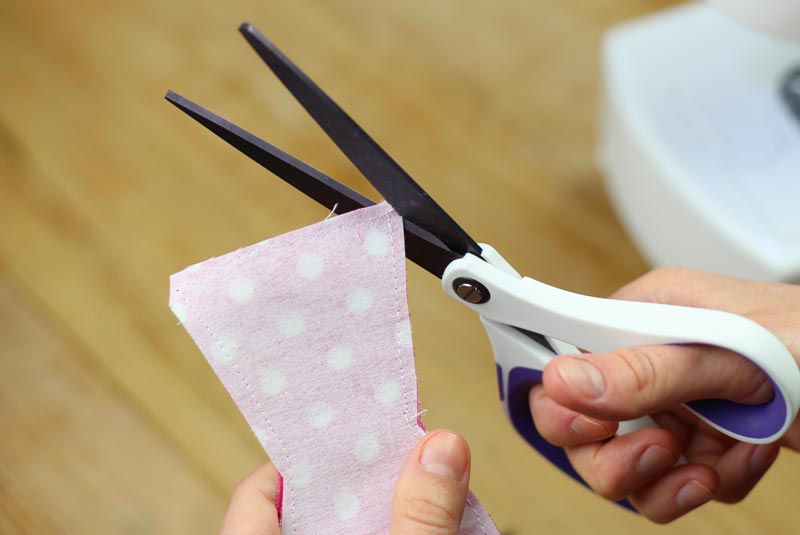
Step 4: Turn it Inside-out
It’s almost time for the big reveal! But before turning it inside out you’ll want to clip the corners of your tie to ensure your bow has sharp points.
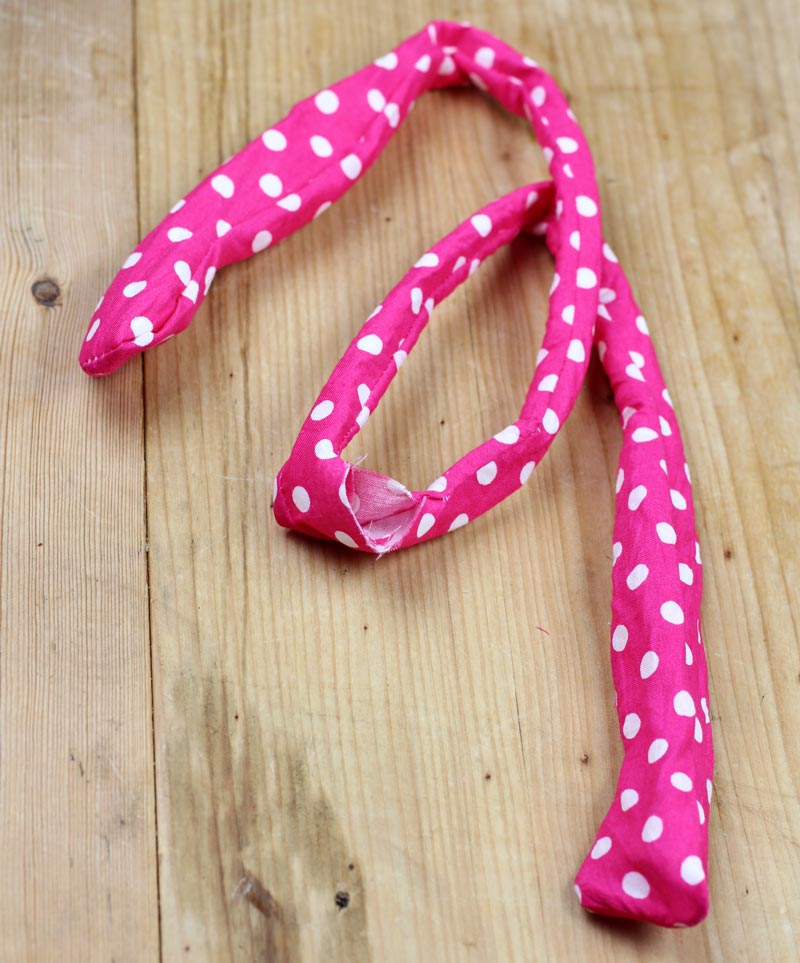
To turn the tie inside out, pinch the end of one side, separating the material, then use a stick to push the ends through the gap left in the middle. I used a knife sharpener we happened to have laying around the kitchen, but any stick-like object (that is not too pointy or sharp) will work.
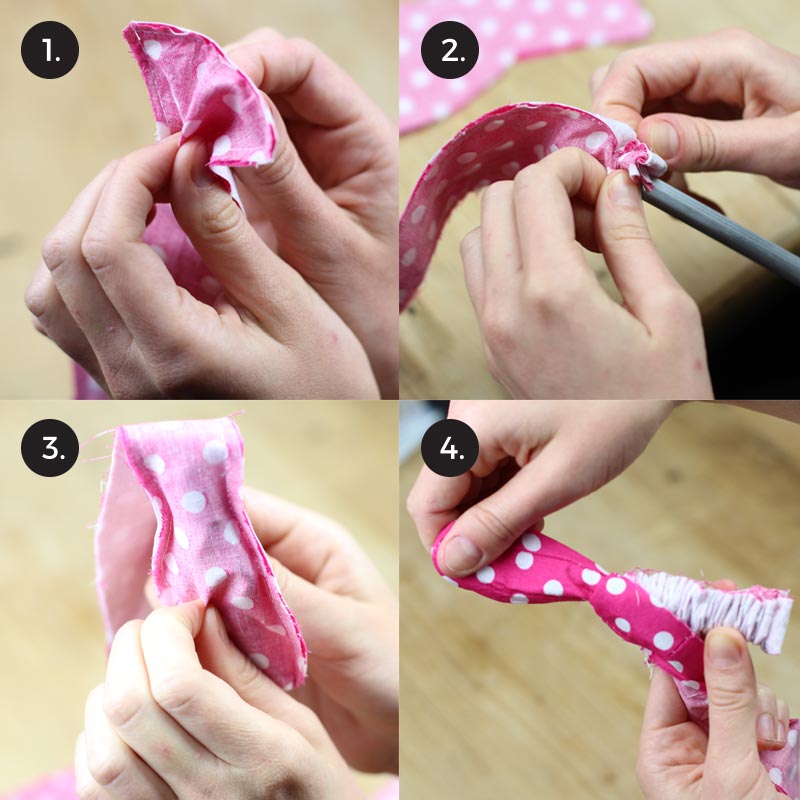
Do this to both sides, scrunching the fabric down the stick until you can pull it through like in the forth photo above. When you’re done you should get a wrinkly snake-looking blob that looks something like this:
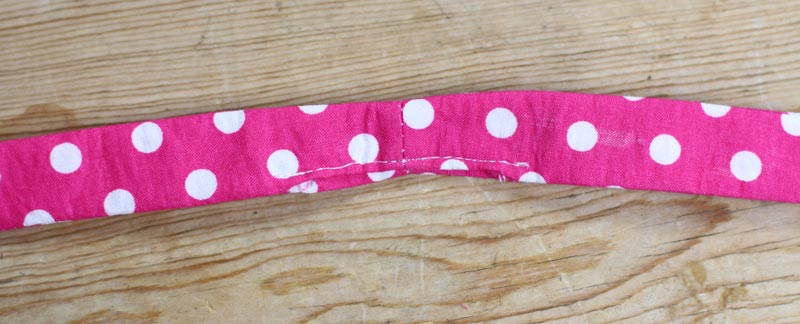
And viola, you’re done! The perfect bow tie! Just kidding. Now it’s time to iron your fabric blob. Use a pair of tweezers to pull out all of little crevices as you iron it out.

Step 5: Mind the Gap
We’re almost there! Now it’s time to sew up that gap you used to turn the tie inside out. For the best results, fold the edges ¼ inch inward and iron them flat. Then, sew the gap up using a matching thread.
When you’re done, it should looks something like this:
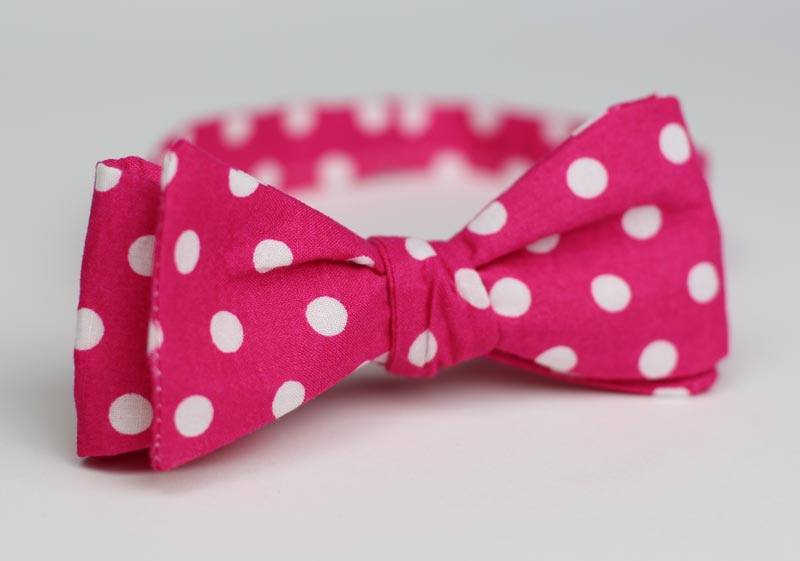
Step 6: Your Finished!
Now tie it on and admire your masterpiece! For a guide to tying the perfect bow, check out my handy instructions on tying a bow tie.
I hope you had fun making your own bow tie. Do you have any tips or suggestions that help make even nicer bow ties? Then please leave a comment below — by Sarah J. Montoro
[associated_posts]