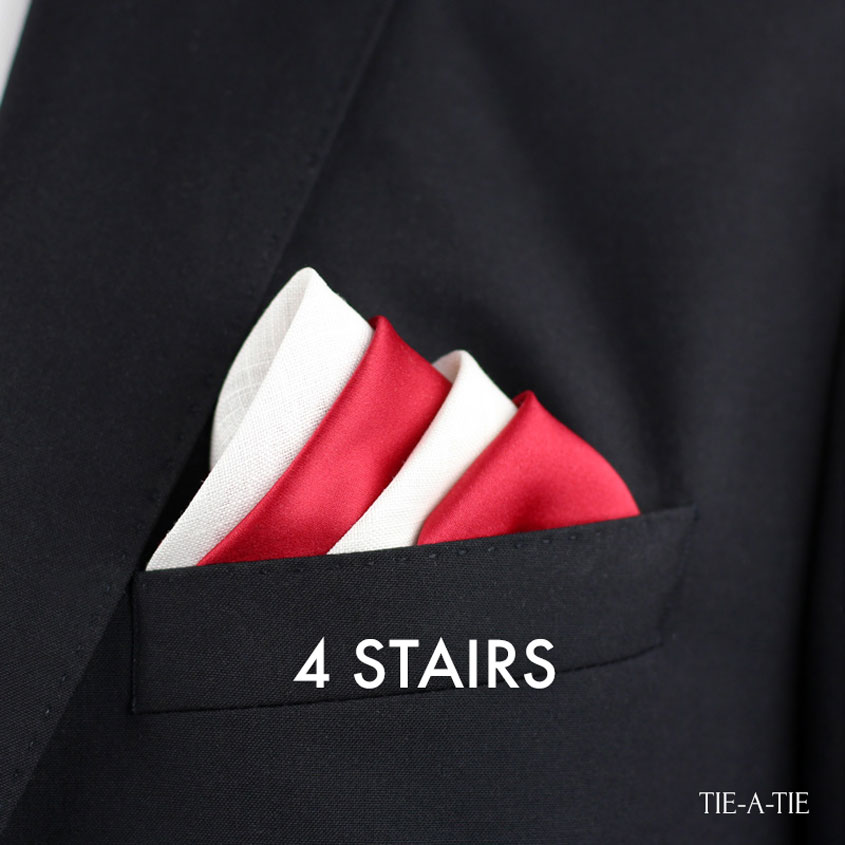
The four stairs fold is the first fold I am featuring in my “50 Folds in 50 Days series” that uses not one, but two pocket squares. It allows you to add yet another color and pattern element to your look. I prefer this fold with either two solid colored pocket squares, or with one patterned and one solid pocket square in color complementing the colors found in the pattern. Because of the added fabric from the 2nd pocket square, I prefer smaller pocket squares that are 13″ x 13″ or smaller in size. The look above was created with one solid red and one solid white pocket square in 100% silk that measure just 10″ x 10″ in size. Here is how you create this fold:
Four Stairs Pocket Square Fold Step-by-Step:
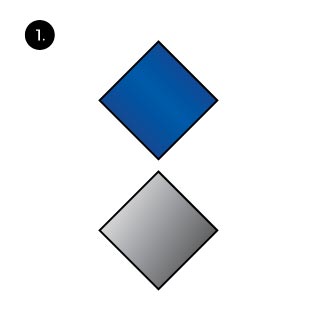 Start out with 2 pocket squares you like to use for this look. I chose a red and a white one for the photo above. Lay both pocket squares down flat.
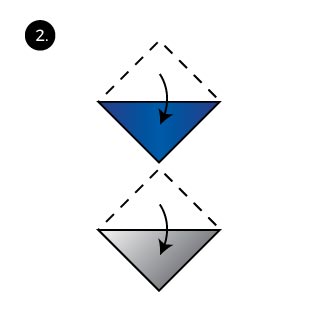 Now fold both pocket squares in half to create a triangle for each pocket square.
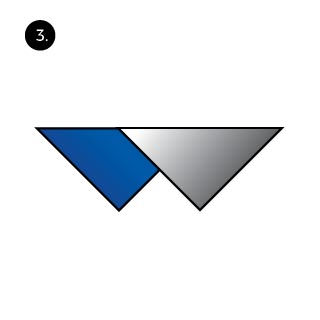 Now lay one pocket square over the other so that one corner of the above laying pocket square ends near the center of the pocket square below.
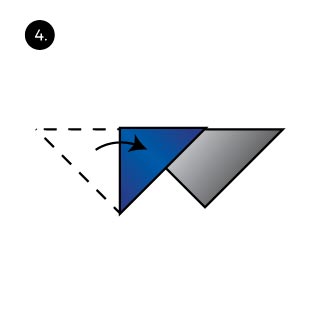 Now fold the lower pocket square in half so that it wraps the other pocket square.
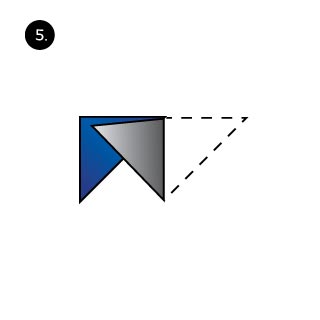 Now fold in the corner of the other pocket square. Fold at a slight angle so that the other pocket square is still visible.
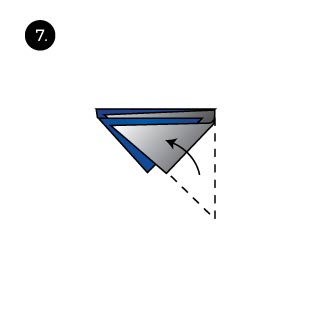
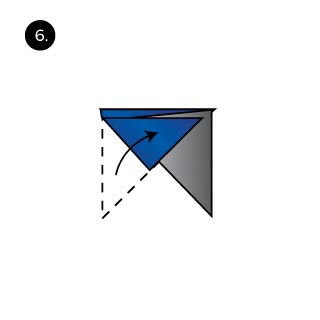 Now fold the other side over. Again, fold at an angle so that the below laying pocket square is still visible at the top.
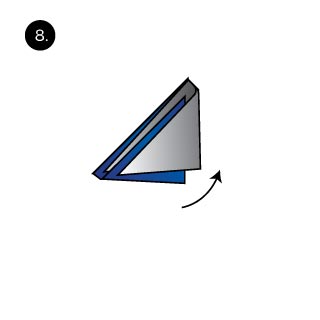
 Again, fold in the other side so that the below laying pocket square is visible.
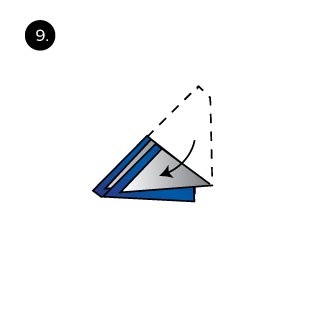
 Now turn the pocket squares so that the stars face to the right.
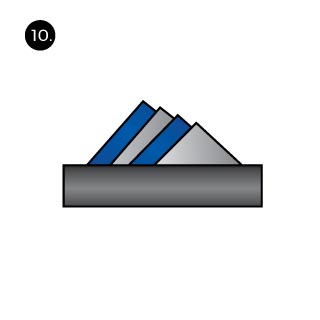
 Because the pocket square is still wider than your breast pocket, we need to reduce the width by folding it in half.
 The fold is complete and all there is left is to carefully place it in your breast pocket.
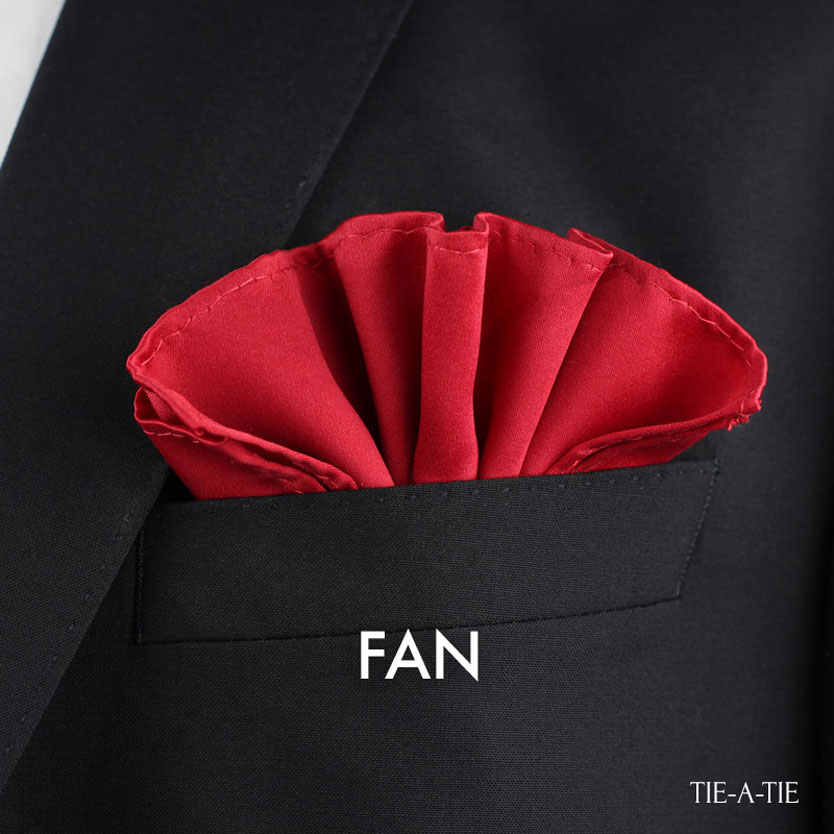
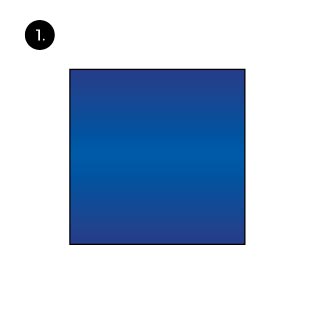 Lay the pocket square down flat.
 Fold in half to create a rectangle
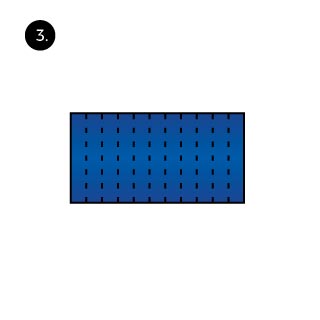 Fold in the pleats so that they are 1/2 to 1 inch spaced apart. Make sure to press down firm on each fold.
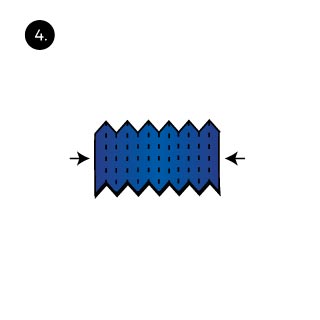 Now bunch up the pocket square like an accordion.
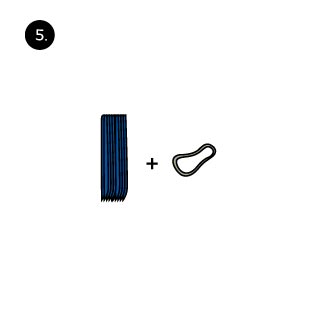 Hold the fold in place with a rubber band about 1/3 down towards the bottom.
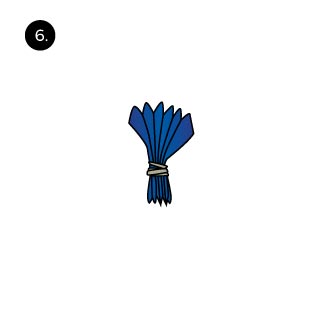 Now spread open the fan
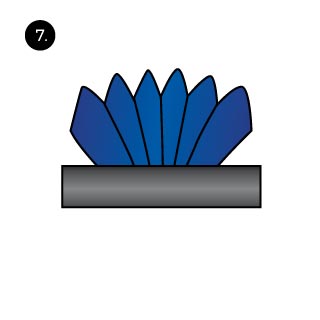 At last place the pocket square in your breast pocket.
 Lay the pocket square down flat.
 Fold in half to create a triangle.
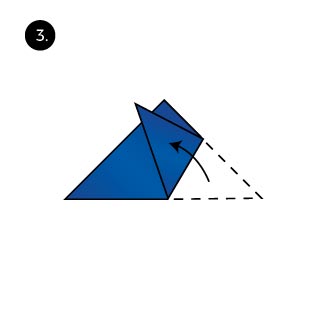 Fold in one corner to create a 2nd tip at the top.
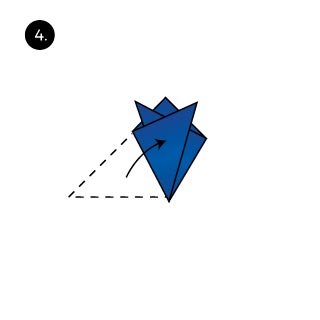 Now fold in the other side to create a 3rd tip at the top.
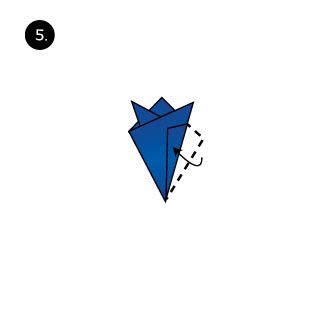 Fold in the right side again to narrow the pocket square and to make it more pointy.
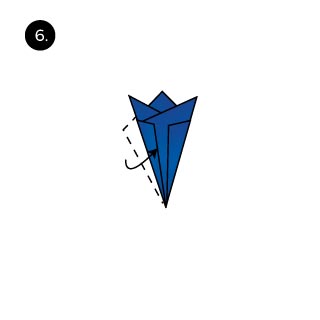 Now do the same with the opposite side.
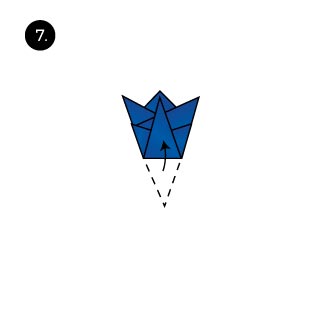 Now fold up the bottom corner to create the 4th tip that sits at the center.
 Lastly place the pocket square in your breast pocket.
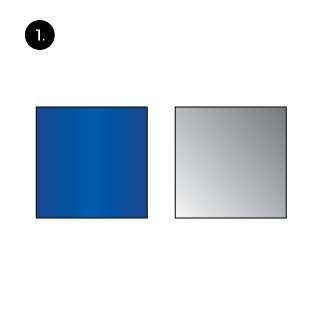 Lay both pocket squares flat.
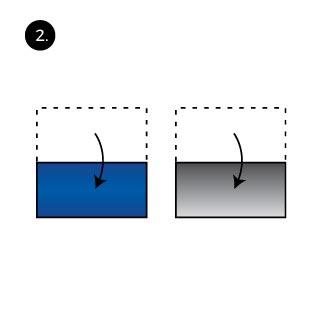 Fold both pocket squares in half to creat two separate rectangles.
 Now lay one pocket square over the other. The below pocket square should be visible at the top. This creates the first layer.
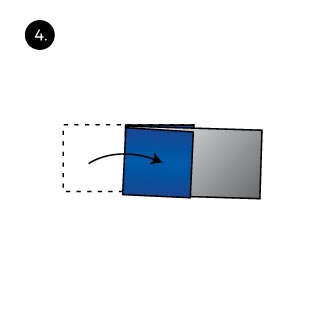 Now create another layer by folding the other side over at a slight angle.
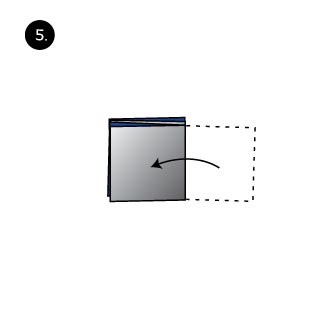 To create the final layer fold over the opposite side again at a slight angle.
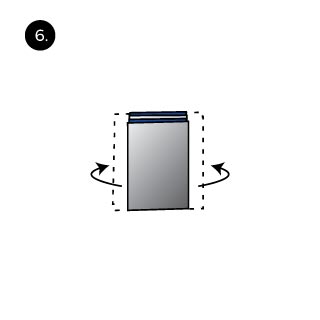 Because most pocket squares will still eb too wide to fit into your breast pocket, fold enough of each side back so that the width fits your breast pocket.
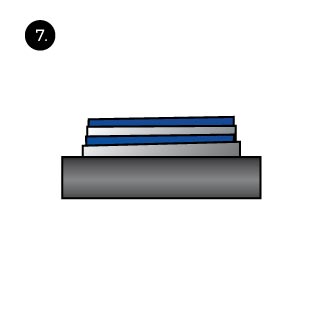 As a final step, carefully tug the fold into your breast pocket.
 Lay your hanky down flat.
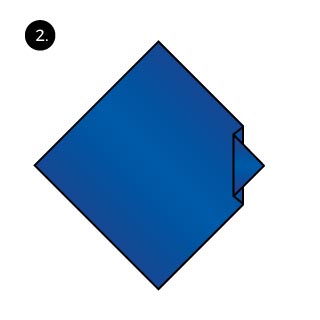 Create a pleated fold starting at one corner. To do so, fold the pocket square in, and then back down. The pleat should be about 1/2 wide.
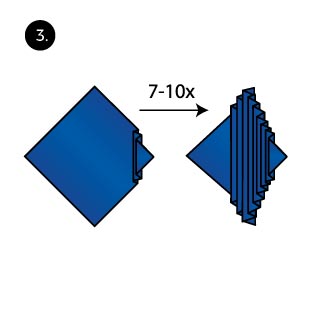 Create 7-10 more pleats by repeating step #2.
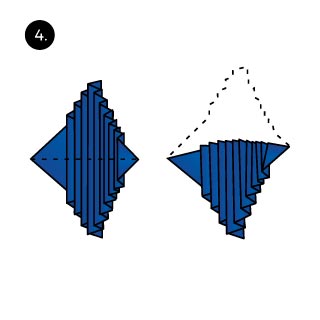 Now fold the pocket square in half at the center.
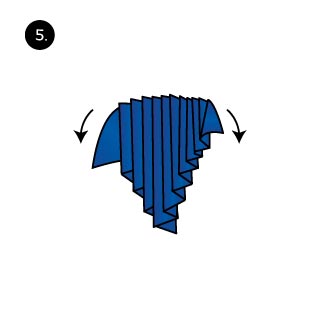 Shape the width so that it fits the width of your breast pocket.
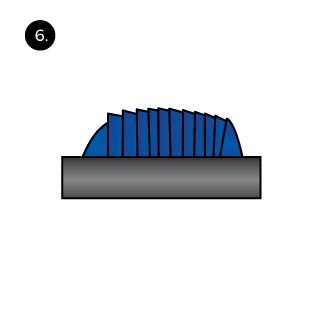 Lastly tug the pocket square into your breast pocket.
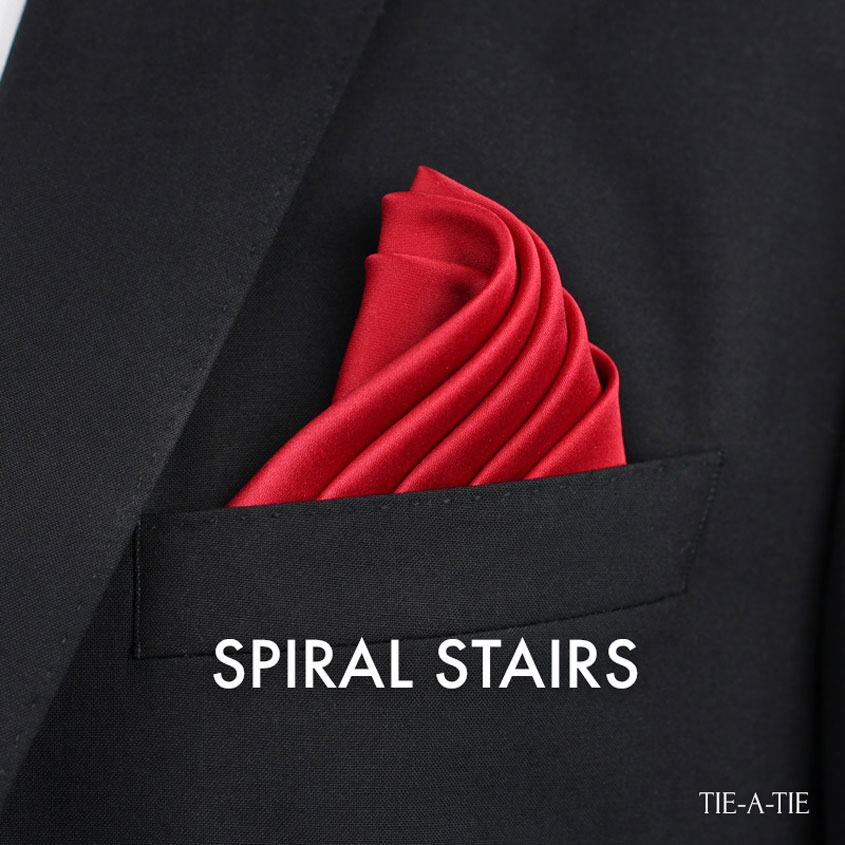
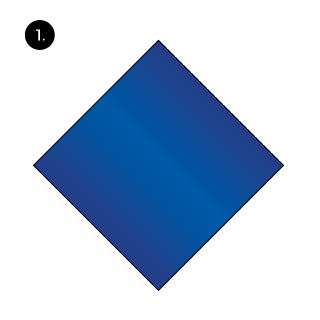
 Lay the pocket square down flat.
 Fold in half to create a triangle.
 Fold one triangle down about 1 inch above the edge.
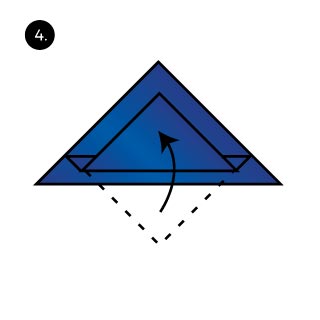 Fold back up to create a pleat.
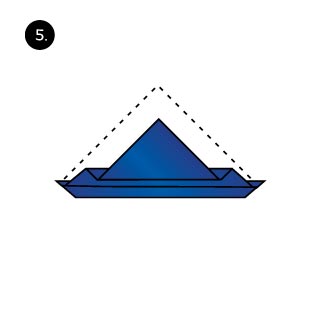 Repeat step 3 and 4 to create a 2nd pleat.
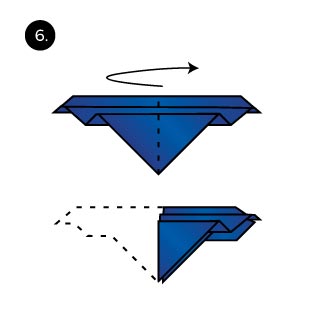 Now lay your pocket square down flat and fold in half.
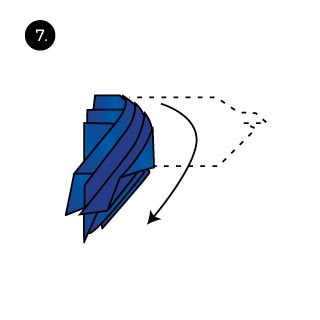 Now create the spiral staircase by bending one side into a half circle. Bend to the left and down to create the staircase-like effect.
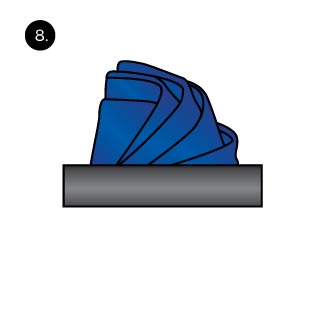 As a final step, tug the pocket square into your breast pocket.
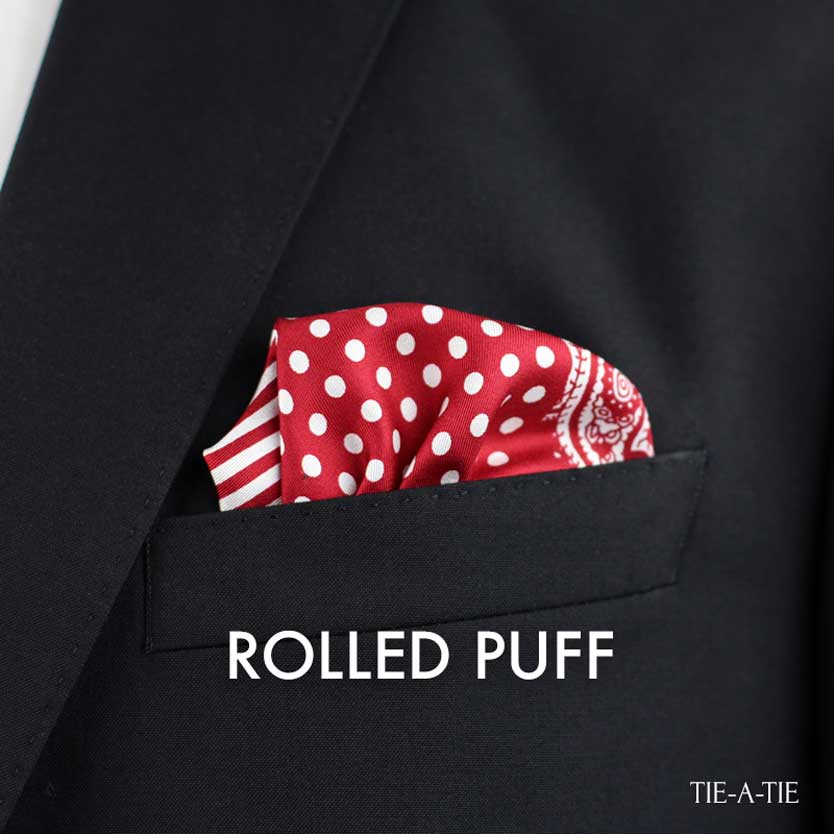
 Lay the pocket square flat.
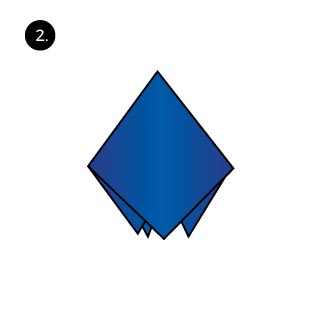 Pick up the pocket square by pinching the center.
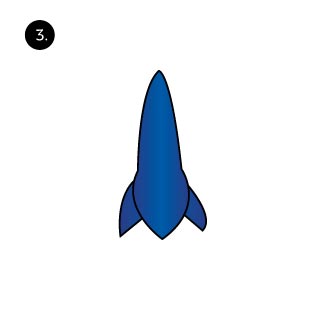 Slide the pocket square through the palm of your other hand.
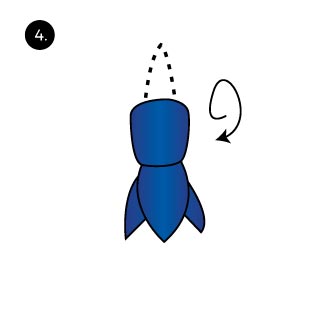 Roll down the top (the “puff”) once or twice.
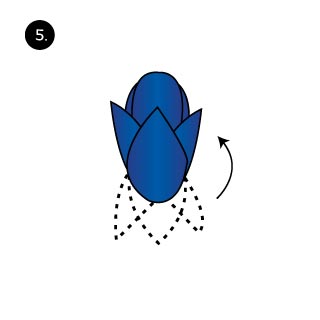 Depending on the size of your pocket square, you may need to fold up the corners from the bottom
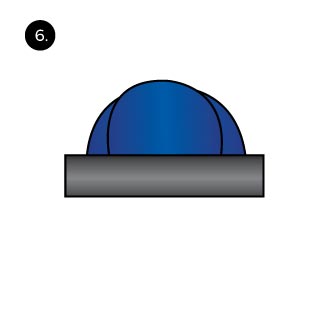 As a final step tug the pocket square into your breast pocket.
 Lay the pocket square down flat.
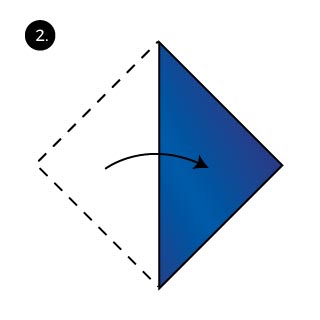 Fold in half to create a triangle.
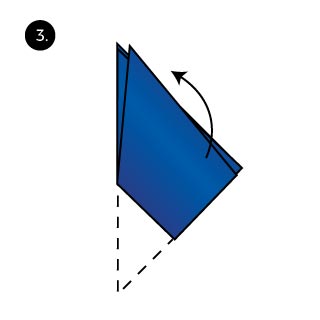 Fold one corner up so that it sits next to the other corner.
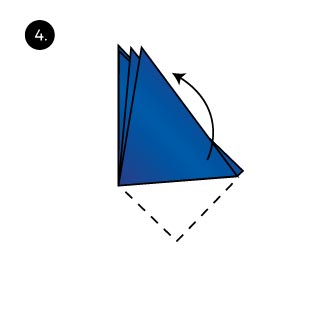 Fold the bottom corner up again to create a 3rd tip.
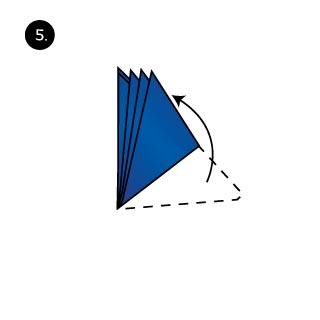 Fold for a fourth time to create a 4th tip.
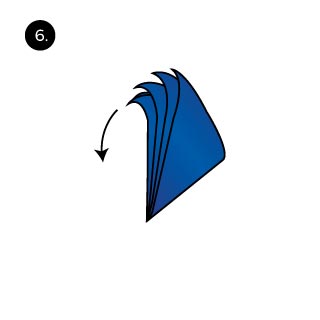 Now bend the pocket square from the four tips.
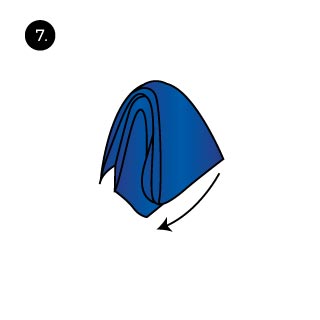 Bend all the way to create a half circle.
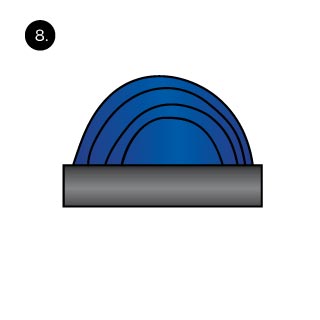 As a final step, tug the pocket square into your breast pocket and give it some final styling to your liking.
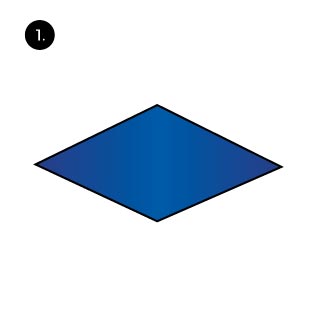
 Lay the pocket square down flat.
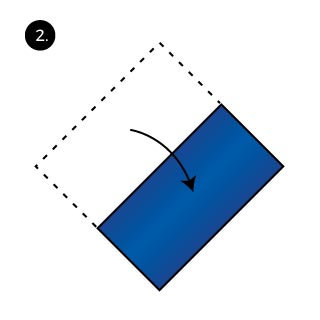 Fold in half at the center.
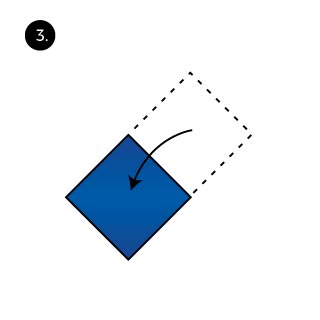 Fold in half again to create a smaller square.
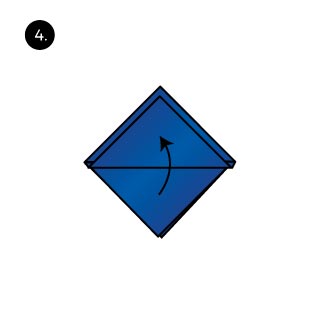 Now fold in one leaf of the open ended corner. Fold just below the other tip at the top.
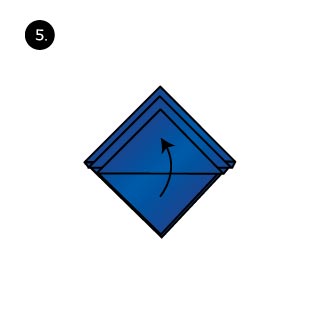 Now fold up the 2nd leaf. Again, fold so that the tip ends below the tip from the last fold.
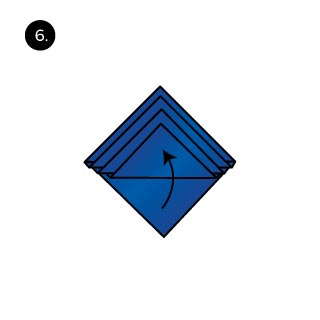 Now fold for a 3rd time.
 And finally fold up the last leaf to create the 4th corner of the diamond.
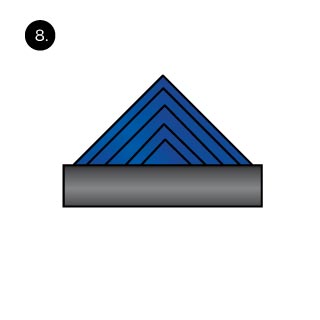 As a final step, tug the pocket square into your breast pocket. If the pocket square is too wide, then fold back each of the sides.
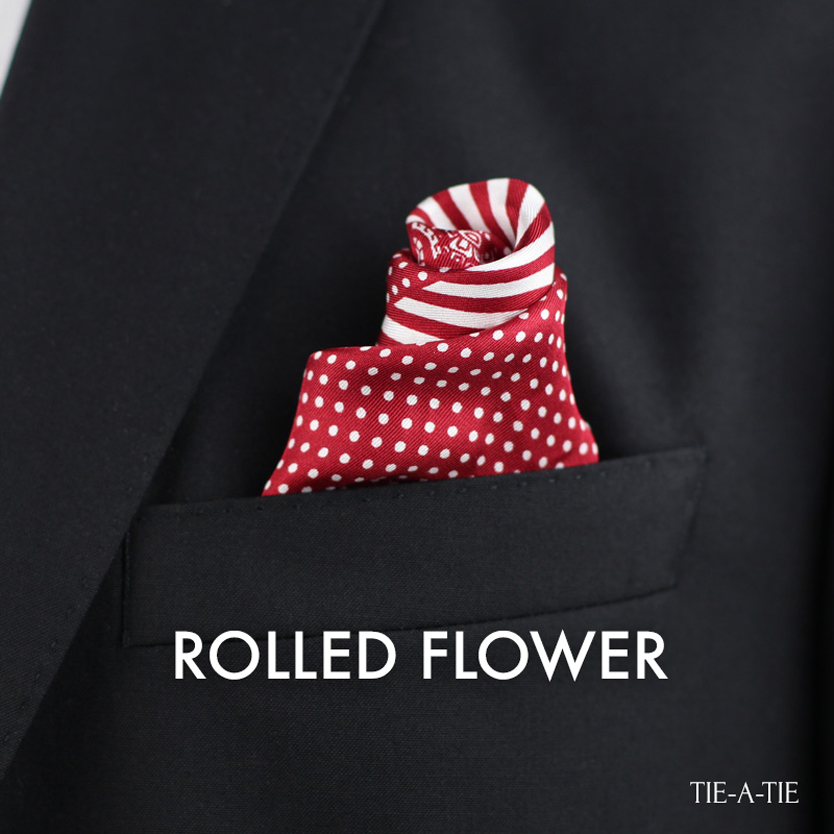
 Lay your pocket square down flat.
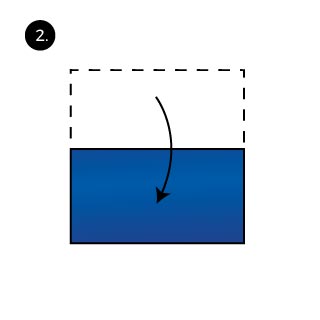 Fold in half to create a rectangle.
 With the closed edge facing up, roll in the pocket square.
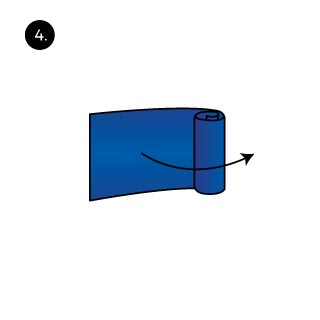 Roll at a slight angle so that the inner tube sticks out a bit.
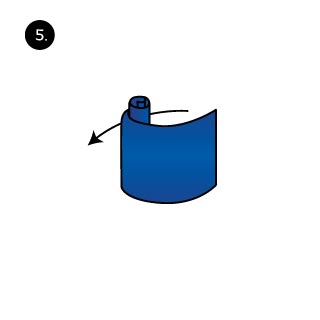 Keep on rolling…
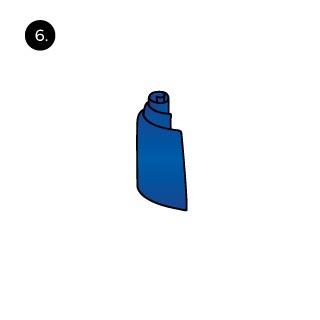 And keep rolling. Make each turn wider than the last to make sure your pocket square gets wider and will take up the entire width of your breast pocket.
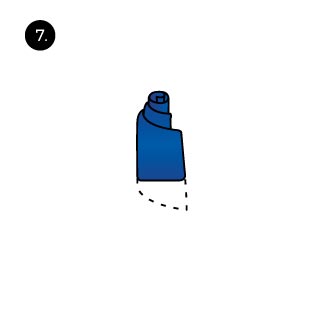 When all rolled up slightly press down to flatten the pocket square just a bit.
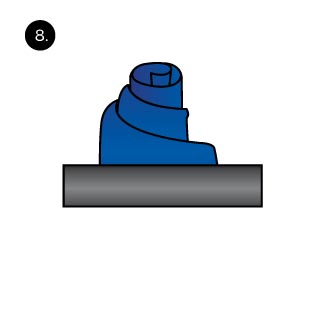 As a final step, tug the pocket square in your breast pocket. The flower should be sticking out and should be wider than the part tugged inside your breast pocket.